Lead climbing. That somewhat horrifying but undeniably attractive activity that you’ve probably seen some of the local crushers practicing at the gym.
Today we’re going to tell you everything you need to know to lead climb like a pro, lead belay like a boss, and give you some bonafide-tested steps to lead climbing mastery.
Whether you’ve been top roping at your local gym, watched some sport competitions at a friend’s house, or gone on a guided trip, you may already know a thing or two about lead climbing.
It adds a couple new dimensions to the climbing experience: greater physical demand, and greater potential risk (adding a mental demand, too).
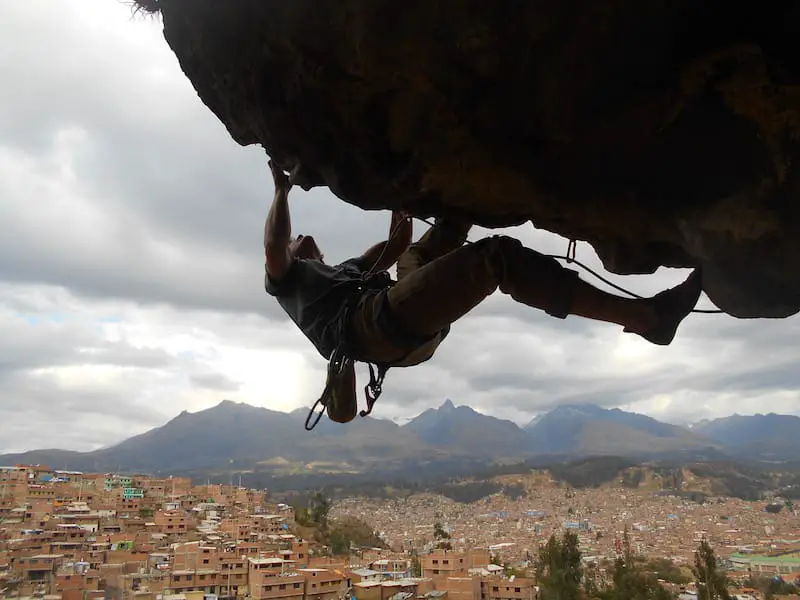
Lead climbing also opens a big and exciting door to the world of rock outside, allowing you to scale beautiful cliff faces around the globe.
For any aspiring climber, learning how to lead is a critical accomplishment. So, let’s get into it!
*IMPORTANT AUTHOR’S NOTE:*
It is equally as critical that climbers learn how to lead properly.
Before getting into any new activity, it is a great idea to do research and develop a base of knowledge.
This article will help you in doing just that.
However, to actually learn and practice lead climbing, you should definitely, 100%, pretty please, consult a certified instructor through your local gym or guiding company.
Yes, it is a time commitment and will cost you more money than having your buddies teach you on random trips outdoors.
But these sacrifices are very worth it.
Learning how to lead climb and lead belay properly can be a matter of life and death – for yourself, as well as other people. Being taught well will also ensure you develop good habits in climbing and belaying.
In turn, this will make you a more trustworthy and appealing climbing partner. And a more radical climber in general!
Hey! By the way… this page contains Amazon affiliate links. So if you make a purchase after clicking one at no cost to you we may earn a small commission. Thanks for your support!
What is Lead Climbing?
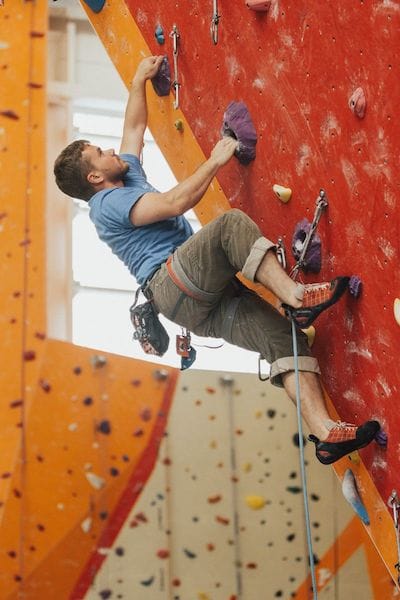
Lead climbing is a type of rock climbing that can be done in a gym and outside.
It is a good idea – and is required in most gyms – to learn how to climb and belay on top-rope before learning how to lead.
After all, you wouldn’t fly a commercial jet until you’ve learned how to pilot a small two-seater plane.
Like with top-roping, the climber must wear a harness and ascend up a wall.
However, there are a few key ways in which lead climbing is unique:
- The rope is not already affixed to the top of the route.
Instead, the climber must have their own special rope which they begin with on the ground.
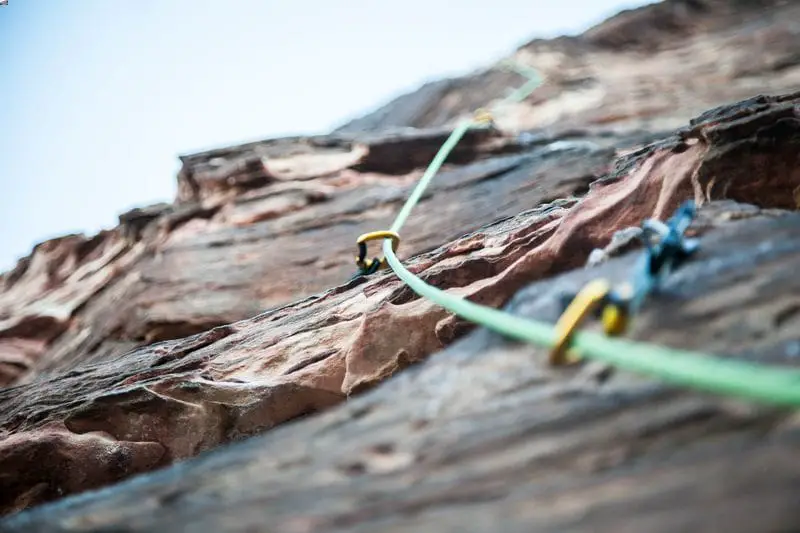
- The climber must clip into protection as they climb.
In most climbing gyms, permanent carabiners are attached to the wall for lead routes which the climber clips their rope into.
On climbing routes outdoors, there are bolts periodically placed. These bolts have hangers on them, or metal loops.
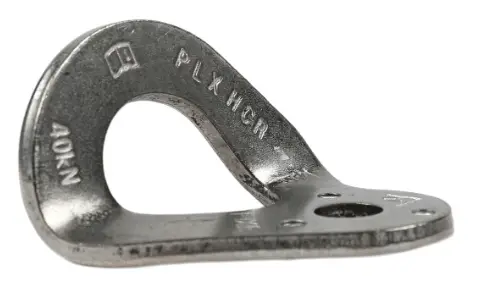
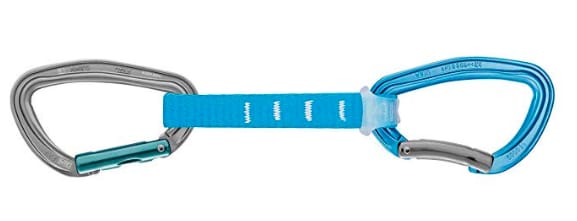
The climber must bring their own quickdraws to clip into the hangers for protection as they climb up.
Quickdraws consist of two carabiners attached to opposite ends of a piece of webbing. In outdoor lead climbing, one carabiner is clipped to the hanger, while the other carabiner dangles down, to be clipped into with the climber’s rope.
When getting ready to climb a route outside, the climber must clip quickdraws to the gear loops on their harness. Every route has a unique number of bolts, usually listed in a guidebook or on Mountain Project. However many bolts there are on a route is how many quickdraws should be carried on the harness.
- If the climber falls, they will free-fall a certain distance until caught by their last “piece” of protection.
This distance is dependent upon how far the climber has ascended above their last piece, as well as how much slack their belayer has given out to them.
Falling while lead climbing should never result in injury (except for extremely rare instances of gear failure), as long as the climber and belayer have done everything correctly.
The most common injury in lead climbing is ankle injuries, caused by hitting your foot hard against the rock, or head injuries.
For that reason, make sure to always wear a climbing helmet while lead climbing!
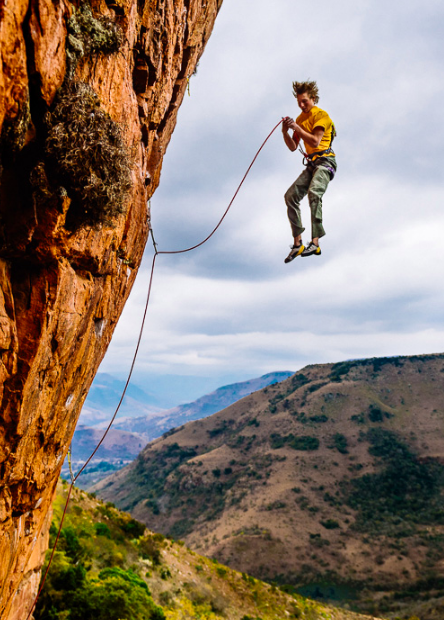
Lead climbing can be exhilarating and scary for many people.
The potential for falling on lead is what results in a greater mental challenge – management of fear.
It can be more difficult to commit to a hard move with the threat of taking a fall, or “whip”.
- Lead belaying, or belaying a lead climber, requires a special technique and heightened awareness that is very critical in preserving the climber’s wellbeing.
This style of belaying is different from top-rope belaying, albeit using the same belay devices. When the climber is moving, the belayer gives out slack.
When the climber falls, the belayer secures the rope in order to catch them.
Although intimidating at first glance, lead climbing is very fun and not super difficult to learn. As long as you become acquainted with all the necessary gear and the proper ways to use it, you can greatly mitigate risk.
How to Lead Climb Like a Pro!
Some of the most important parts of lead climbing are done on the ground.
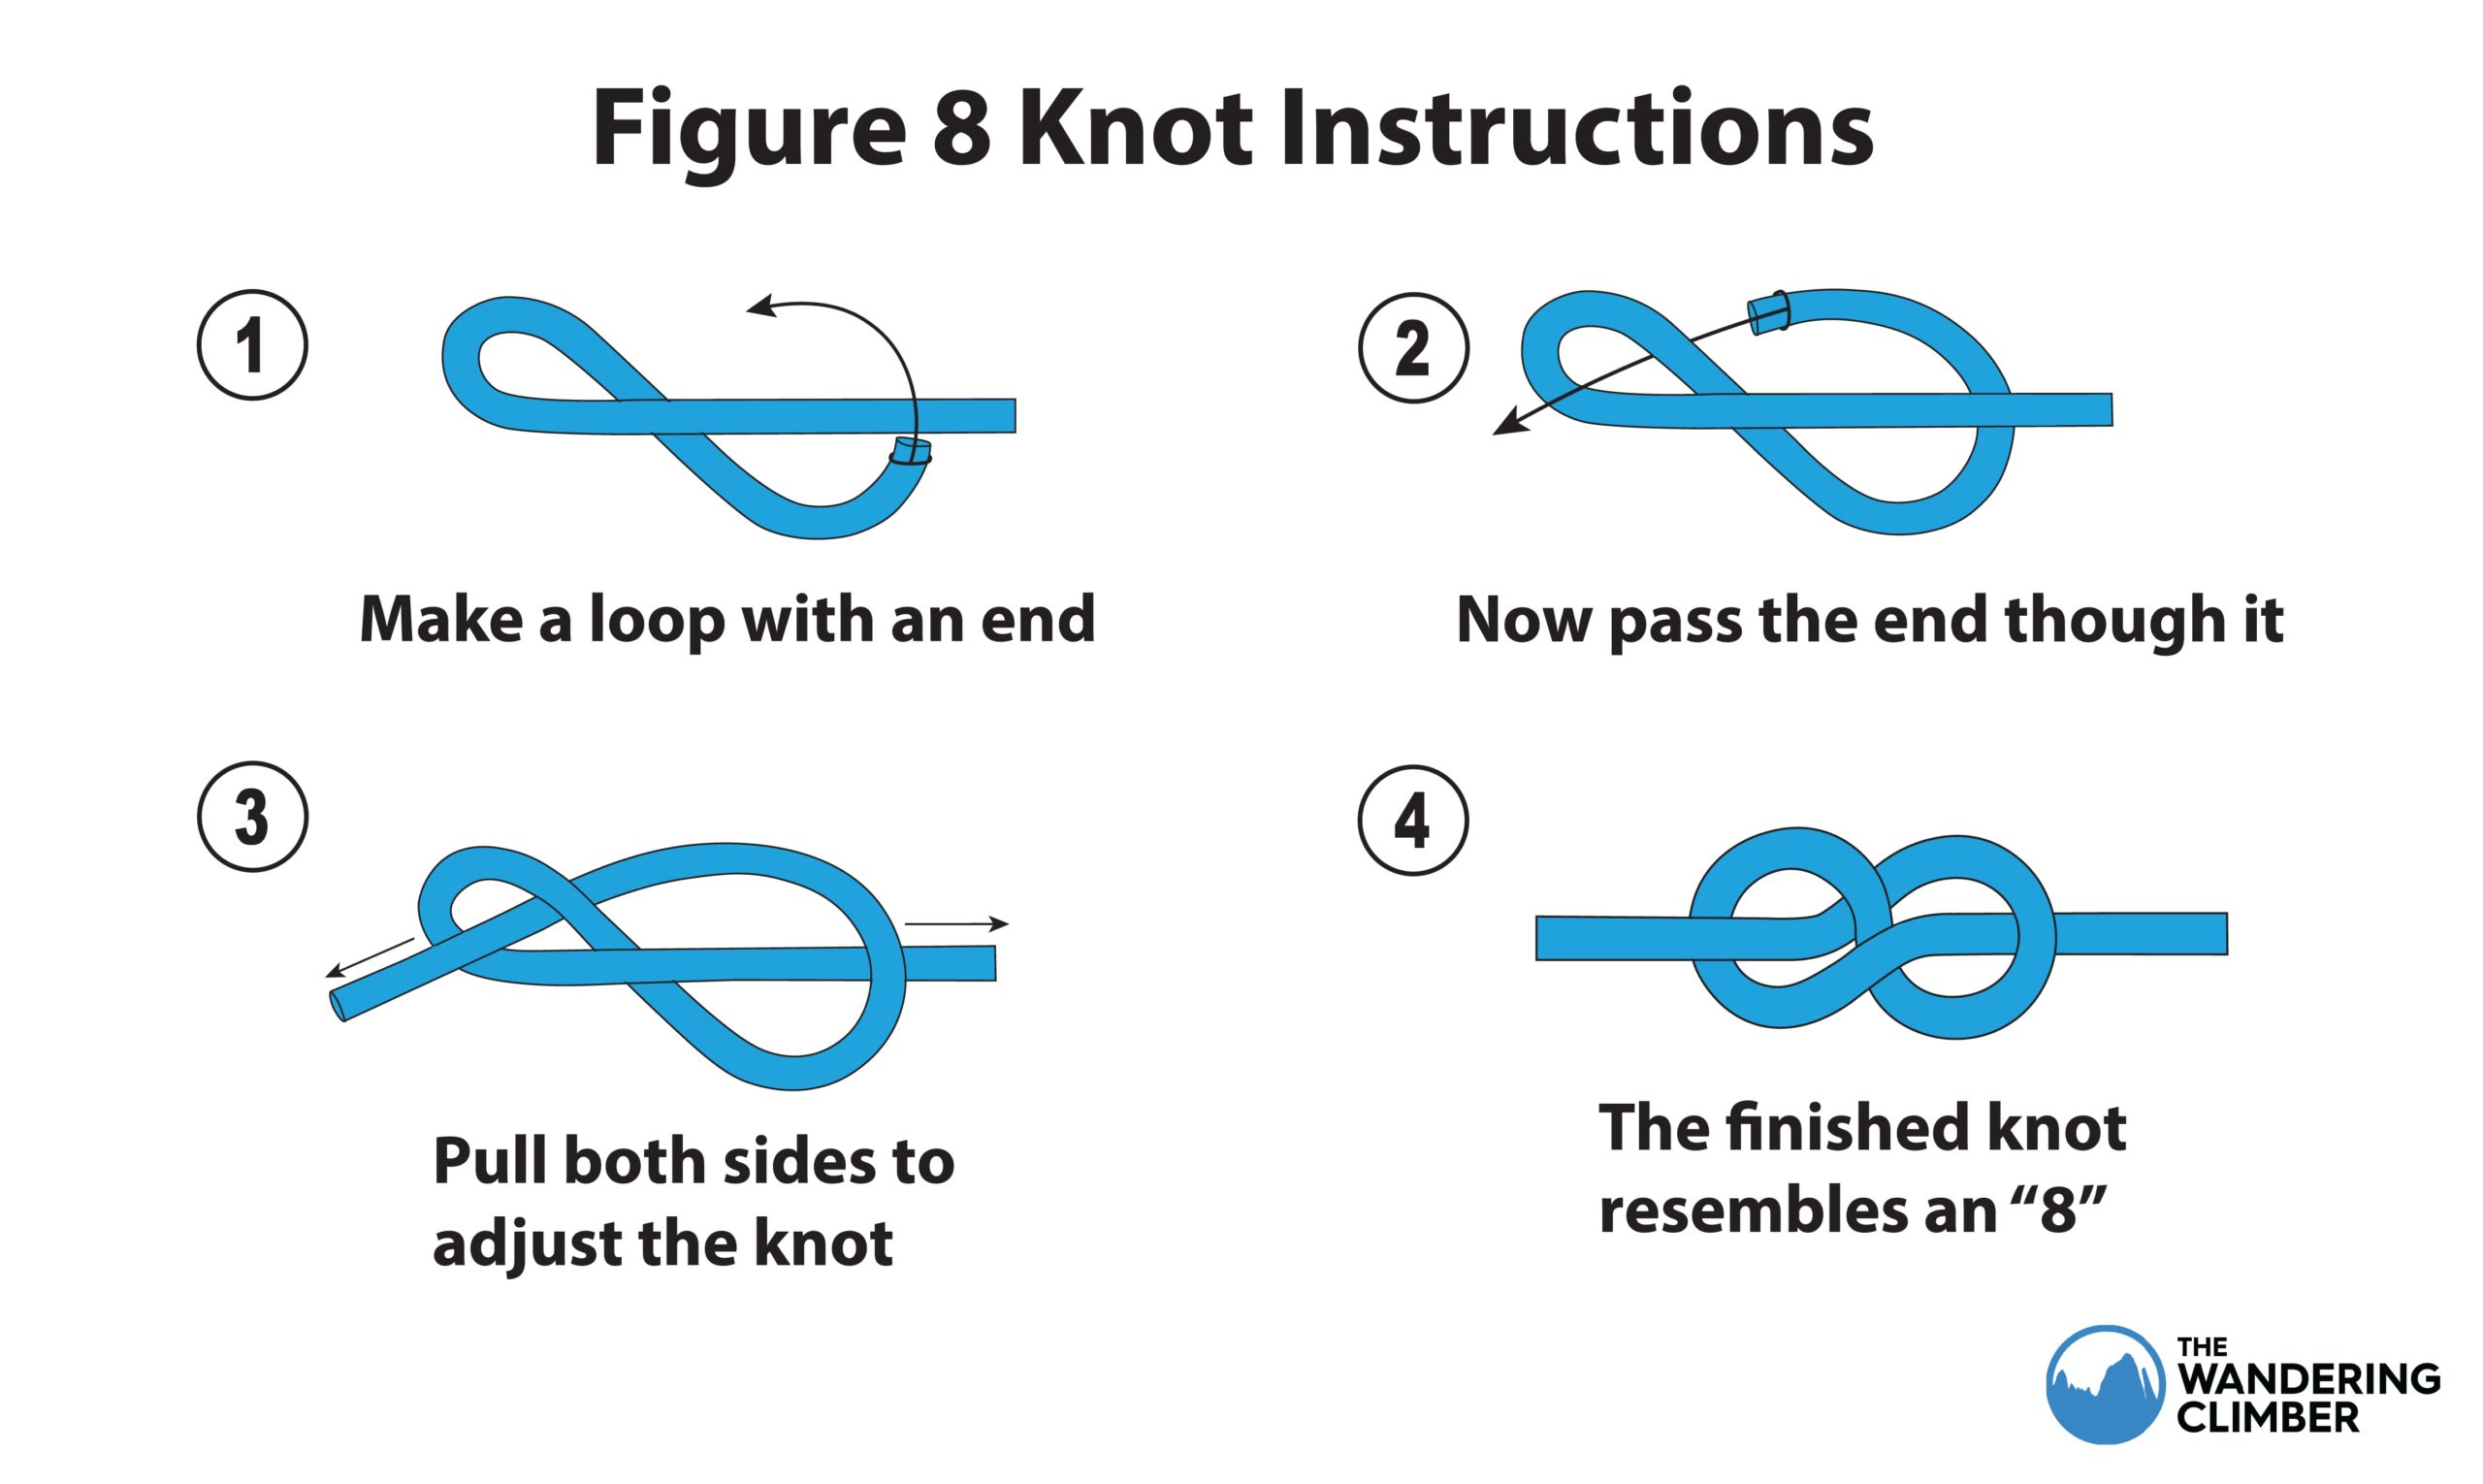
Before starting up a route, the lead climber must first tie into one end of a rope using their knot of choice – either a bowline with a back-up, or most preferably, a double figure eight.
It is important that the rope be specifically designated for rock climbing. Climbing ropes are dynamic, which means they stretch when weighted. This attribute is important because the rope can disperse the force of a fall, rather than the human body absorbing most of it.
A fall of three or more feet on a static (or non-stretchy) rope can result in serious spinal injury.
Climbing ropes are very strong, and can handle the force of a person falling many, many times. They also come in lengths adequate for spanning the heights of sport climbing routes.
If outdoors, the climber will then attach the necessary number of quickdraws to their harness. The number of quickdraws needed can be determined by counting bolts with one’s own eyes, or consulting a guidebook.
At the finish of every bolted sport climbing route should be an anchor. Anchors usually consist of two bolts with hangers, and a set of chains dangling off each hanger.
Two quickdraws should always be brought to account for clipping into anchors. This is what the climber lowers off of to return to the ground.
There are two bolts at anchors (instead of one) for redundancy. That way, if one bolt were to fail, the other could still support the climber.
The chances of a bolt failing are very slim, but it is best practice to maximize safety.
Once the climber is tied in and has all the quickdraws they need, they should check themselves.
Now they’re ready to go.
Psych!
They also need to have their belayer look at them and double-check that everything is good:
- Is the knot going through both soft points on the harness?
- Is the knot tight and tied the right way?
- Are the buckles on the harness fastened? Does the harness look frayed, as if it was fifty years old and just pulled out of their great uncle’s basement?
- Are there enough draws to finish the route and clip both anchors?
If all these criteria are met, the fun can begin.
And the fear flatulence.
This usually happens when a climber is first beginning a lead route, when the nerves are getting excited. Belayers beware. Pre-session bathroom trips are highly recommended, particularly after morning coffee.
The lead climber starts ascending the route from ground up, with the rope dangling beneath them. If the first bolt is at a dangerous height – i.e. more than ten feet – using a Stick-Clip is highly recommended.
Stick-Clips
This is a contraption consisting of an extension pole with a device at the end. A quickdraw with rope pre-clipped in is placed into the device, which can then be held up using the pole and secured to the first bolt. Stick-Clips are the way to go, unless, of course, you master the art of rodeo-clipping…
As the climber climbs, they will periodically reach bolts. Whenever they reach a bolt, they must stop and be prepared to hang on for a moment in one spot.
This is because they must then use one free hand to unclip a quickdraw from their harness, and clip it into the bolt’s hanger. Once the quickdraw is secure to the hanger, the climber pulls up enough rope from beneath their harness to “clip in” to the bottom carabiner of the quickdraw.
In the gym, you don’t need to worry about carrying and placing your own quickdraws – the walls will already have them.
Clipping Into a Carabiner
A carabiner has a gate, which is a lever that pops open and close like a door. “Clipping in” consists of pushing the rope against the lever so that it opens, and allows the rope to slide into the carabiner. The gate then closes automatically.
The rope must be clipped into the carabiner so that the climber’s end (the end of the rope closest to their harness) rests forward/in front of the carabiner.
Clipping the rope into a carabiner (of a quickdraw) sounds simple, but if done incorrectly, can result in serious problems. There are actually TWO ways in which a carabiner can be clipped wrong:
Back Clipping

This is when the rope is clipped into the carabiner with the climber’s end facing backwards/resting behind it. In this case, if the climber were to fall above the quickdraw, the rope could unclip itself from the carabiner.
Z-Clipping

If the climber accidentally grabs their rope from underneath (and not above) their previous quickdraw and clips it into the next, the rope will no longer be in a straight line.
Instead, it will resemble a “Z”. Z-Clipping renders the previous protection ineffective as the rope will no longer be running through it properly. This is most likely to occur when bolts are closely placed.
To avoid back clipping and z-clipping, always pay attention and be sure to grab the rope right where it leaves the knot on your harness when pulling up slack to clip into a quickdraw.
Anchor Bolts
Once the climber reaches the anchor bolts, they must place two quickdraws into the hangers with the gates opposing. This means if one quickdraw is facing to the right, the other should face to the left. Now, the climber can clip their rope into both quickdraws and be lowered back down to the ground.
When a climber starts to get on routes that are more difficult, they tend to face a greater risk of falling. Falling, however, is a huge part of lead climbing, and can make it seem quite scary.
Although it’s almost impossible to get used to the stomach-twisting feeling of taking a quick drop, it is very possible to take countless falls without ever getting injured.
Check out this awesome video by REI that demonstrates everything about falling on lead and ways to reduce risks associated with falling:
How to Lead Belay Like a Total Boss
If you’re considering learning how to lead belay, hopefully you have already mastered the skill of top rope belaying.
Starting with top rope belaying helps you develop a foundation of knowledge and comfort with the belay device and belay technique under less pressure.
This is because top rope belaying is generally simpler and less attention-demanding than lead belaying.
Learning top rope belaying first also helps you ease into understanding the literal and figurative gravity of holding up a human life. Lead belaying creates new risks that can make this process a little overwhelming.
Nevertheless, as with any new task, comfort and expertise is gained with experience.
Gear for Lead Climbing
Lead belaying involves the same device used in top rope belaying – a belay device. There are countless variations of belay devices made by different companies. Most people either use an ATC or Petzl’s GriGri.
ATC
The ATC is a simple device that has been around for decades. It consists of a tube with a retaining wire loop, which is then attached to the hard point of a harness with a carabiner. When belaying with an ATC, you are fully responsible for braking the rope when the climber falls.

- Synthetic
- Multiple friction modes for belay and rappel
- Updated construction makes the device 10% lighter with improved rope handling.
- Now 80g
- Auto-block release hole accepts small carabiners
- Durable cable holds its shape and resists getting caught up
This is a vulnerability with the ATC, because if you lose control of the brake rope for one of many reasons, the rope will slide through the device and drop the climber.
Note: “Brake rope” refers to the end of the rope leaving the belay device towards the remainder of rope collected on the ground. It is opposite of the climber’s end of the rope, which goes up from the belay device towards the climber.
GriGri
The GriGri is a somewhat recent invention. It has a special camming mechanism inside its bulky metal exterior, so when the climber’s end of the rope is pulled with force (as in the event of a fall), the device itself locks the rope from sliding through.

- Belay device with assisted braking, for a broad range of single rope diameters (8.5 to 11 mm), designed for the experienced belayer
- Belay device with assisted braking, compatible with a broad range of single rope diameters, for both gym and crag
- Exceptional comfort during descents
- Designed for experienced belayers
Although the ATC is a fine option for lead belaying, the GriGri provides added security which is especially beneficial outdoors. At the crag, there are many factors out of your control, like falling rocks and wildlife, that can cause you to let go of the brake rope.
For this reason, I highly recommend investing in a GriGri versus an ATC when you decide to learn how to lead belay. The device is worth every penny and more, as its camming mechanism can be the difference between an alive or dead climber.
Note: There are other devices which have a similar active or passive camming function, but none provide as smooth and user-friendly of a belay as the GriGri. Such is why, at any gym or crag, you’ll see a GriGri more than any other device.
After the climber ties into the end of the rope, the belayer will set up their device several feet down the rope. This amount should allow the climber enough slack to reach the first bolt (if they are not stick-clipped).
While the climber makes their way up to the first bolt, the belayer should spot them. Spotting is not to literally catch the climber if they fall, but rather to protect their head from hitting the ground.
Once the climber has clipped into their first quickdraw, the belayer may stop spotting and start using the belay device.
In lead climbing, the belayer’s job is to pay out slack at an adequate rate as the climber ascends a route. The climber’s movement should not be restricted by the rope tugging on them from below.
Think of it (vaguely) as walking a dog on a leash. You don’t want the leash to be extremely tight so it pulls the dog back. Instead, you keep up your pace so that the leash allows the dog just enough freedom of movement that they don’t notice the leash is there.
The general rule of thumb for lead belayers is to always have a “beer belly’s” worth of slack out at all times while the climber is moving between bolts.
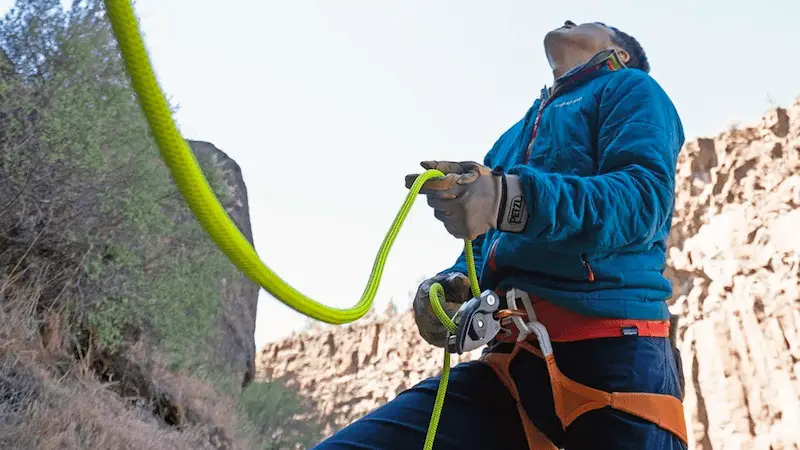
Image: 5c Climbers
When the climber has clipped a quickdraw to their next bolt, the belayer should feed out a few armfuls of slack so the climber has enough rope to pull up and clip into the quickdraw. Once the climber has clipped in successfully, the belayer can take in any remaining extra slack and start slowly feeding it out again as the climber moves.
The belayer needs to pay extra attention in this moment. Sometimes, a climber may secure a quickdraw to the bolt, but then not have enough remaining energy to pull up rope and clip in. On rare occasions, the climber may even pull up slack to make the clip, but then drop it because they are too “pumped out” (their forearms are tired).
In such cases, the belayer should be prepared to catch a fall:
- When the lead climber takes a fall, the belayer should have out just a few feet of slack. This is to provide a “soft catch” for the climber, so they will not swing hard back into the wall at the bottom of the fall. But, there should not be so much slack out that the climber would fall far enough to hit ground.
- The belayer must keep a firm grip on the brake rope, even when using a GriGri, so the rope does not slide through the device and lower or drop the climber.
- The belayer should also get into a controlled stance as directly underneath the first bolt as possible, because they might get pulled up and towards the wall with a lot of force. Facing the wall and bending the knees to potentially kick them out as needed can prevent a full-blown body slam.
- If the climber falls but has not gotten very far up a route, or if the route is sparsely bolted, there is potential for the climber and belayer to collide into each other. This happens when the climber falls low enough and the belayer gets pulled up high enough that they meet. The best way to prevent injury in this scenario is for the belayer to know it is about to happen, and not be standing in an awkward position.
- Please Note: Weight difference is a serious factor in lead climbing. If the climber weighs significantly more than the belayer (i.e. 50 pounds or more), they may take larger falls as their weight will pull the belayer up higher. It is safer to belay someone who is closer in weight to you, or consider purchasing an Ohm. Think of it like a see-saw; if a heavier person suddenly sits on one end, the lighter person will shoot up super fast.
The same methods should be used when catching a climber if they surprise fall between bolts.
Sometimes, the climber reaches a bolt, clips rope in, and then wants to take a rest versus continuing on. In this instance, the climber might yell “take!”.
The belayer should take in all the slack from the rope until it is taut, then let the climber know they can let go of the rock and hang without having to take even a small fall. Exclaiming a simple “I’ve got you!” will do. When the climber is ready to resume climbing and pulls back onto the rock, the belayer simply lets out a little slack again.
While lead belaying, you should constantly be prepared to take up rope on command or catch announced and unannounced falls. Such requires constant watch of the climber. Belay glasses can help make this less of a literal pain in the neck.
Once the climber has clipped into both anchors, or desires to return to the ground at any point on route, the belayer must lower them. Lowering consists of releasing slack at a slow and steady pace, while still maintaining control of the brake rope.
- With an ATC, this can be done by simply easing one’s grip on the brake rope.
- The GriGri has a lever which must be pulled up to release slack. Your left hand pulls up the lever while your right hand remains loosely on the brake rope.
Once the climber has reached the ground safely, the belayer has successfully fulfilled their role.
Lead Climbing Risks
The risks involved in lead rope climbing all have a relation to falling. Depending on the clipping position and how tight your rope is, you can fall anywhere from 5 to 30 feet.
Any fall will be twice as long as your rope is to your last piece of protection. It’s scary to think about, but we need to be aware of the climbing risks in order to prevent the mistakes that lead up to them.
Pendulum Swings
When you fall, your closest bolt will prevent you from falling far. However, if the rope is too tight with not enough slack, this can result in a pendulum swing that doesn’t give enough space or time to put your feet out and cushion you from the blow, smacking you straight into the rock face.
Concussions, abrasions, bruises, or even broken bones can happen from this, and so it’s important to have a experienced belayer that will properly belay you and know the key moments when slackening or tightening your rope.
Danger Feet (Toe Tucking)
This is a mistake often made by beginners, but it’s the worst mistake to make. It happens when your toe, foot, or leg goes between the rock and your rope.
It might not sound like much, but it will lead to very bad injuries. When you fall with danger feet, your leg catches the rope and spins you upside down, often twisting you into an awkward position. This gives you no control as to how fall and means you’re likely to swing at the rock head-first.
Avoiding toe tucking can seem tricky because you’ll need to adjust the way you climb, but it’s definitely achievable with awareness, training, and intentional thinking.
Just remember to not have your leg between your rope and the wall. Also, have your belayer watch out if they spot you doing it.
Decking
Decking is when you fall and hit the ground, and you’re at risk of this when the length of the rope from you to your last bolt is greater than the distance of that bolt to the ground. Meaning, you’ll hit the ground before the rope could catch you.
An incident like this can lead to injuries that range from broken bones and spinal fractures, to even death. It should be avoided at all costs.
This usually occurs on the first bolt, when you haven’t reach the second one yet. But once you’ve clipped that second bolt, you’re mostly safe from this happening. Until then, climb extra carefully and have your belayer spot you.
Another thing to help avoid decking is using the stick clip that was mentioned earlier, a handy tool that’ll prevent the risk of this from the get-go.
Improper Clipping
As mentioned earlier, improper clipping can lead to risks such as the rope unclipping itself from the carabiner (back clipping), or the rope not running through in a straight line, rendering the last protection useless (z-clipping).
This can cause the lead climber to fall and even farther distance, and increases the risk of decking. To avoid this mistake, make sure to familiarize yourself with the correct way to clip in and have your belayer watch out for mistakes like these.
Belayer Risks
As a lead climber, your reliance on your belay is even more than on a top climb. Many of the risks mentioned are dependent on the vigilance and competence of the belayer, and they have a part in spotting all these mistakes.
It’s why finding an experienced lead climbing belayer is so important, because you are trusting them with your life, and having a newbie belayer will not only bring you more anxiety on your climb, but the potential mistakes made can be disastrous. If you do have a newbie belaying you, have a certified instructor there to oversee them for safety and peace of mind.
Understanding Fall Potential
Falling in lead climbing is part of the experience. It’s inevitable, but minimizing the risk that comes with it is definitely possible, as long as you follow the instruction of your lead training and keep in mind the important notes talked about here.
There will be fears regarding it, and it’s an obstacle many climbers need to face, but know that falling is the natural byproduct of pushing yourself and developing new skills. And as you continue and learn how to fall while lead climbing, you’ll eventually familiarize yourself with the experience and be able to move on and focus on developing your skills, rather than that primal fear.
Lead Climbing Tips
Here are a few quick tips to keep in mind that’ll help when you’re starting out:
- Start out easy – go for a route not demanding or hard, and one without moves that will make you question your ability. Once you’ve successfully climbed one or two, you’ll be more comfortable and can move onto harder routes.
- Go with the right belayer – have a partner that is experienced, who you have good communication with and is mindful, patient, and knows what they’re doing.
- Know the climbing terms – go over the terms with your partner to ensure clear communication when climbing, which are similar to top roping terms but with a few added ones like “clipping”, “slack”, “take” etc.
- Practice clipping bolts – doing this will help you become familiar with the right motion, and practice with one hand as you’ll be doing it one-handed on the wall.
- Consider taking a practice fall – feel how it is, and if it’s okay, you’ll worry less about falling.
- Don’t rush clipping – it’s easy to want to clip in faster because of the craving for safety, even if it’s way above your head. But it’s not ideal for many reasons, and usually the best holds are beside the bolts anyway. Have the bolt around head-waist height before clipping.
- Rest if you need to – if you’re feeling tired or unsure while a few feet away from the last bolt, consider downclimbing to below the bolt, call out for your belayer to “take”, and rest like you would for top roping.
A Step-by-Step Path to Lead Proficiency
That was a lot of information, but now you have a foundational understanding of leading that will help you get into action more quickly. Really excited to learn how to lead but don’t know right where to start? Follow this checklist!
- Go to your local gym and pass a class on top rope belaying
- Get comfortable with climbing and belaying on top rope
- Purchase your own harness, belay device, and climbing rope. Make sure you get the right ones that suit your specific needs, and also the requirements of your local climbing gym (e.g. a harness suitable for lead climbing, a rope that is long enough, etc.)
- Enroll in a lead climbing class at a climbing gym or guiding company
- Pass the class and get your lead certification
- Get further instruction on outdoor lead climbing and route cleaning if you plan to go outside. Some gyms and outdoor stores like REI provide clinics, or you can find a certified instructor through a guiding company. Avoid allowing your buddies from the gym or random folks from online climbing forums to teach you at all costs. Learn from an AMGA certified instructor, or whatever organization sets standards for climbing in your country.
Do not be intimidated by the learning process. Anyone can master the foundations of lead climbing and belaying. Have fun with the experience, and look forward to the best benefit:
Being able to experience the endless amounts of amazing rock climbing in every corner of the world!
Q&A
How do you start lead climbing?
Head to your local rock climbing gym and pass a class in top rope belaying. After, get comfortable with belaying and climbing and when you’re ready, buy the needed lead climbing equipment and enroll in an indoor lead climbing class.
How do you lead climb better?
It’s all about practice. Familiarize yourself with the motions of lead climbing – with clipping, falling, and moving with the rope, whilst overcoming the mental challenges of lead rock climbing, and soon you’ll also be able to focus more on technique and developing your skills.
Where do you keep your rope when lead climbing?
Always keep the lead climbing rope between you and the wall when climbing, and if it runs off to one side, make sure it’s closer to the wall than you. Also, be careful not to let the rope go behind your leg – if so, step out and over the rope to avoid the risk of toe tucking.
How to rest using gear when lead climbing?
If you need to rest, backclimb to the last bolt if you’re above it, until you’re below, then call down to your belayer to take the rope so it’s taut. After, you’ll be able to “sit”, rest, and clear your head until you’re ready. Pull back to the rock and have your belayer simply let out some slack again when you are.
What rope do I want to lead climb?
When looking at lead climbing gear, make sure the rope you get is dynamic rope (so it stretches). A 60m rope is the standard, but when deciding what length to buy, remember that it needs to be twice as long (or greater) than the route or pitch you’ll be climbing.
How good do you have to be to lead climb?
If you’ve passed your top roping class and gotten a lead climbing certification too, you should be ready to try it out! Rule of thumb: you should be able to comfortably climb at least 5.9-5.10a on top rope before you start lead climbing.
How do I learn to lead climb outside?
Get further instruction on how rock climbing works for outdoor lead climbs from a certified instructor through a guiding company, or take classes from gyms or outdoor stores like REI for a great lead climbing tutorial.
How to fall on a lead climb?
There are several points to note, such as climbing rope management and communication with your belayer too, so check out this video by REI that covers the need-to-know about falling in lead climbing!
When should you learn how to lead climb?
When you feel you’re familiar with climbing and belaying for top roping, you can take the next step and try out a class in lead climbing.
Can you lead climb by yourself?
Yes, this is called rope solo lead climbing, but it is a very dangerous style of climbing. It’s an advanced maneuver and should not be tried for beginners. Even experienced lead climbers have difficulty lead soloing, and if done wrong, can lead to serious consequences, even death.
How long of a static rope should you bring to lead climb?
First, never use a static rope for lead climbing or top roping. It is the incorrect rope, and you should be using dynamic rope, as it stretches and has a softened “catch” for the climber. Standard length is 60m, but get a rope that will be twice as long, or even longer, than the height of the route.

Melissa is a full time van-living outdoor enthusiast hailed from Florida. After deciding to spend her freshman summer of college living out of a tent to work and climb in the Red River Gorge, Kentucky, her life changed forever. She found her way to El Potrero Chico, Mexico in the winters, where she fell in love with travel and community. Post-graduation, she drove from Florida to Alaska to experience its world-class backpacking, then worked her way back south to explore climbing spots throughout the western U.S.
Meeting countless amazing people, hearing their stories, and learning the histories and struggles of local areas through minimalist travel, climbing, and hiking has inspired her to share these experiences with others. Her passions include improving intersectional access to the outdoors and responsible environmental stewardship.