Contrary to common belief, the hardest part of climbing a rock face isn’t always the ascent. After all, you can control that process with a myriad of techniques and gear to guarantee excellent safety.
But when it’s time to descend, that’s when adrenaline really floods your body. Descending usually depends on a single rappelling system. If the climber misuses it, they might face serious injuries.
That’s why I decided to write this detailed guide. We’ll take a look at the different rappelling gear, styles, and precautions. Let’s get started!
In this guide you will find:
Hey! By the way… this page contains affiliate links. So if you make a purchase after clicking one at no cost to you we may earn a small commission. Thanks for your support!
Rappelling Gear: What You’ll Need to Prepare
Alright, now that you’re familiar with the basic techniques, you can start preparing the required gear.
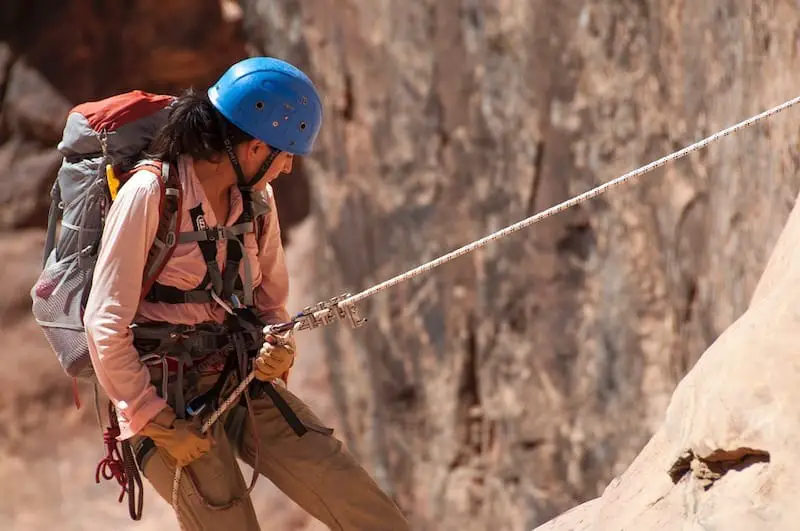
Rappelling Belay Device ~ The Most Crucial Of Them All!
The belay devices are obviously the most important tools in the rappelling gear setup. Their special designs allow you to control the descending speed by creating friction with the rope.
You can find dozens of belay devices on the market. For the sake of simplicity, I’ll only list the most famous ones.
ATC Device

![]()
- Ideal for: Multi-pitch routes, sport climbing, and gym climbing
Short for Air Traffic Controller, the ATC is, hands-down, the most beloved belay & rappel device. It was introduced into the market by Black Diamond, which is the same company that invented climbing cams and nuts.
Any ATC device is designed with two tubular slots. To use it, you should loop your rope, and insert it into the slot that matches your dominant hand. In other words, right-handed climbers should use the right slot, and vice versa.
Regardless of the slot you choose, you should then clip the rope into your harness with a suitable carabiner. While descending, your brake hand should always grip the brake-side end of the rope to control the speed.
Figure-8 Belay Device

![]()
- Ideal for: Caving and sport climbing
As the name implies, figure-8 devices are designed with two holes — one of them is larger than the other.
Unlike ATC devices, figure-8s can be used in many configurations. For the most basic setup, thread your looped rope into the large hole, and pass it over the small hole until it rests on the central stem. Afterward, you should clip your carabiner into the small hole, and use your brake hand to control the brake-side of the rope.
Even though these devices seem fairly straightforward, they can be quite tricky. Because they twist the climbing rope, you must apply more force to provide sufficient control. For that reason, beginners should opt for simpler rappel devices.
GriGri

![]()
- Ideal for: Caving and sport climbing for beginners
Although the previous belay devices help control your descending speed, most of that control depends on your arms. If you suddenly lose your grip, you might fall to the ground at a fatal speed.
To make the rappelling experience safer for beginners, many brands started to develop assisted-braking belay devices that feature special camming mechanisms. If you’re interested in this category, you should consider Petze’s GriGri device.
To use the GriGri, open the hinged plate, feed the rope around the camming apparatus, and close the device to clip in the carabiner at the bottom hole.
Before heading to the cliff, you should test the GriGri by forcefully pulling the rope. If connected properly, the GriGri must immediately stop the rope after you increase the pulling speed. This way, it’ll safely tether your descent if you encounter any sudden falls.
Rappelling Rope

![]()
If you want the best experience, you shouldn’t use your climbing rope to descend off a rock face. Why? Well, climbing ropes are dynamic, meaning that they can slightly stretch when heavily loaded. They’re beneficial for climbing because they can dampen any sudden falls or shocks, which minimizes the probability of gear damage and physical injuries.
When rappelling, you can’t use dynamic ropes because they’ll bounce every time you stop. That’s why you should substitute with a static rope.
As the name suggests, static ropes are made of inelastic materials that’ll allow you to fine-tune your descent speed.
Don’t Forget to Learn the Prusik Knot
The prusik knot is an additional rappelling gear that you should add to the rope in order to halt your descent if you accidentally let go of the rope.
To tie it, get a small chord and tie its ends together. Wrap that cord around the rappelling rope by threading it into itself three or four times. After pulling tight, clip it into the carabiner. The knot should now be ready to hold your body weight in cases of emergencies.
Repelling Harness

![]()
![]()
Rappelling harnesses have to tick lots of boxes. They must be made of comfortable materials that provide robust support. My favorite product is the Black Diamond Momentum Harness. Thanks to its thick build, it can be equally effective for rappelling and climbing.
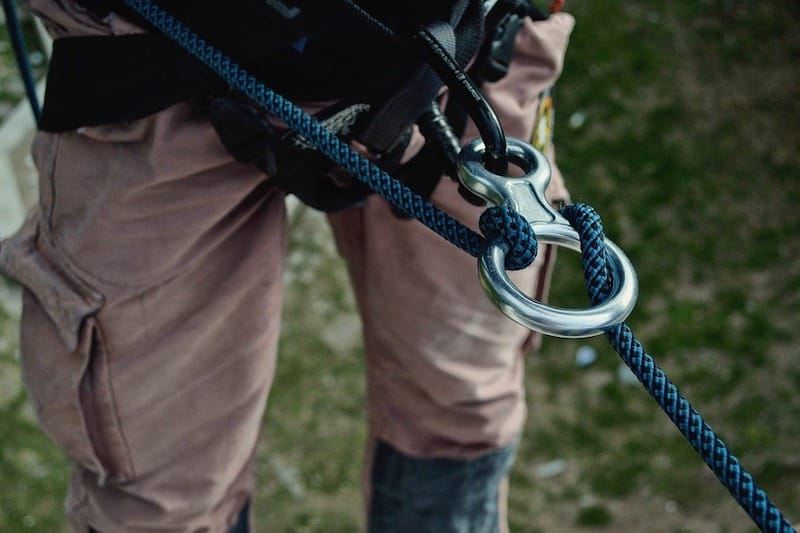
Locking Carabiner

![]()
You’ll have to pack dozens of carabiners with different designs on any climbing endeavor. For rappelling, I highly recommend using a pear-shaped carabiner, which is often called HMS biner.
Unlike other carabiners, pear-shaped models have large gate openings, which facilitates rope clipping. The wide top also gives enough space for tying safety knots, such as the munter mitch (more on that later).
Climbing Helmet

![]()
Ideally, the climbing helmet must fit well over your head to provide enough protection without being too restrictive. Unfortunately, there’s no definite way that you can follow to pick the most comfortable helmet. What feels comfortable for me can feel too wobbly for you. That’s why I recommend heading to an actual store to try as many helmets as you can.
Climbing Shoes

![]()
Some climbing shoes are designed with a slightly sloping design that facilitates tactical climbing. These designs should also be useful for rappelling since they’ll allow more accurate foot control during standard rappels.
But if you’re interested in Australian rappels, you must get a normal pair that lets your feet lie flat on the ground.
Regardless of the shape, any climbing shoes must feature comfy construction that can dampen forceful impacts. I prefer those made with an unlined leather upper because they can stretch up to one full size, allowing you to perform trickier climbing maneuvers.
Wait ~ What Is Rappelling Exactly?
Rappelling is the controlled descent off a steep surface by using a specialized rappelling device and a rope. This technique is especially helpful for pitches that don’t have enough handholds and footholds, rendering them impossible to free climb.
If you’re curious, the term “rappel” is derived from the French verb “rappeler,” which translates “to bring back to oneself.” If you consider the fact that you rappel to bring yourself back to the ground, you’ll find that there’s no better word to describe this process.
But Then What Is Abseiling?
If you’ve been interested in rappelling for a while, I’m sure you’ve seen people using the word “abseiling” to describe the same process. Although the two terms seem utterly different, they actually mean the same thing!
Both terms refer to the controlled descent off a rock face in the absence of other, safer methods. Fun fact: Abseiling is originally derived from the German verb “abseilen,” which translates to “lower on a rope.”
The only difference between these terms relates to geographical usage. “Rappelling” is exclusively used in the US, where “abseiling” is more famous in the UK. Other countries, such as Australia, New Zealand, and Canada, often use both terms interchangeably.
The Most Famous Rappelling Styles (Yes, There are Styles)
Throughout the years, professional mountaineers came up with dozens of rappelling techniques and styles to conquer the various route obstacles. It’s essential to familiarize yourself with the most common styles, their uses, and their required gear, so as to ensure maximum safety.
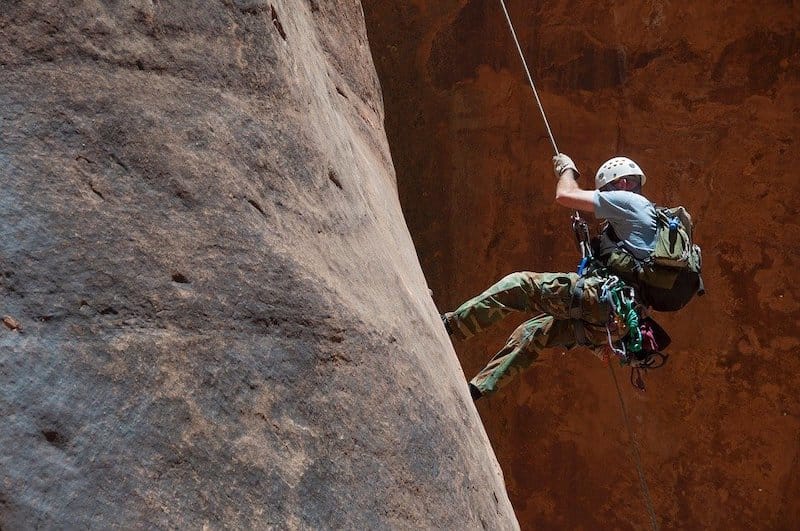
Standard Single-Person Rappel
In a standard rappel, you lower yourself down a vertical rock face with your back facing the ground and your feet supported against the wall. To descend, you use your legs to push yourself away from the wall to create enough clearance. In the meantime, you should gradually let go of the rope to approach the ground.
Because the standard rappel requires minimal gear, it’s the most common style you’ll see. Beginners should definitely master it before heading off to more complex techniques.
Unfortunately, this technique’s relative simplicity tempts some climbers to get overconfident, which usually ends in tragic accidents. You should never ignore the proper safety precautions, no matter how easy the pitch looks.
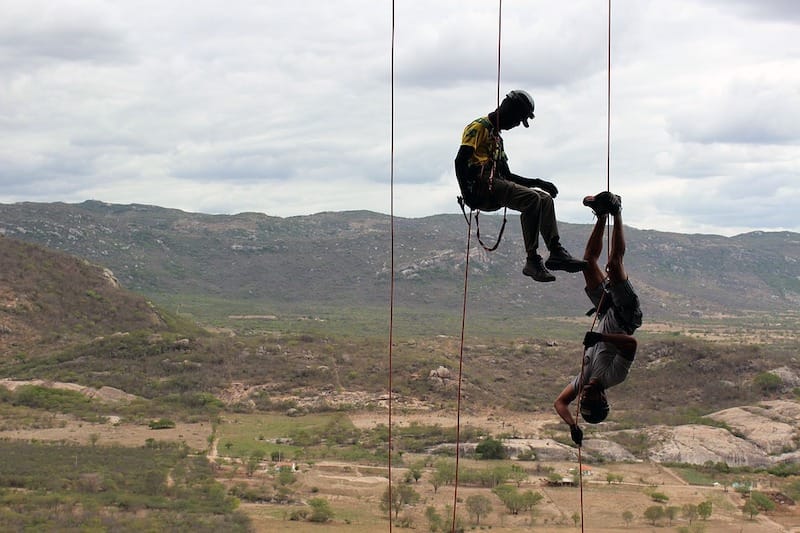
Simul-Rappel
What if you want to descend off a spire in which you can’t insert a stable anchor? How can you use the climbing rope while ensuring enough balance? That’s where the simul-rappelling comes in handy.
Short for simultaneous rappelling, this technique involves two climbers. Both climbers must assume the standard rappel stance. But instead of threading the two ends of the climbing rope into a single rappel device, each climber takes only one end.
When it’s time to descend, both climbers must perfectly synchronize their actions. If one of them makes a sudden move, the other climber will be inadvertently affected. In 2019, the climbing legend Brad Gobright sadly fell to his demise after his partner made a wrong move on a simul-rappel.
Due to its various dangers, simul-rappel shouldn’t be performed unless you have no choice. It should be ideal when you don’t have enough time to descend one at a time.
Australian Rappel
As it turns out, Australians like to sprinkle some adventurous endeavors in all sorts of sports.
To perform the Australian rappel, you should wear your harness backward to have the rope attached to your back. This way, you’ll descend off the rock face with your face directed toward the ground. And, of course, your feet must stay in contact with the wall to control your speed and clearance.
But bear in mind that climbing harnesses were not designed to be worn backward. If you make a jarring stop, you’ll put a tremendous load on your spine. That’s why I wouldn’t recommend the Australian rappel for beginners. You should only use it if you want to descend quicker on fairly easy pitches.
When Do You Need to Rappel?
After discussing what goes into the rappelling process, let’s see the situations where you can practice these techniques.
Rock Climbing
Rappelling is an essential process in all types of rock climbing. Be it basic mountaineering, trad climbing, sport climbing, bouldering, or free climbing — you’ll need to rappel down challenging rock faces which you can’t descend otherwise.
Caving
Just like mountaineering, caving is an exciting sport that attracts all the adrenaline junkies. Exploring these caves is a fascinating experience that makes you feel extremely special. After all, not everyone can glimpse what you see down there!
Although some caves can be entered on foot, others can be reached only by rappelling. Clearly, you must install a headlamp to your helmet to safely control your descent in the caves’ dark environments.
Rescuers
The thing I like the most about rappelling is that it’s versatile enough to be used for non-entertainment purposes. Rescue workers depend on rappelling to quickly reach and help victims in distress.
I’m sure you’ve bumped into dozens of videos of suicide attempts that were stopped by the jaw-dropping interventions of rappelling workers. This is but a humble example of that vast category.
Rappelling With a Munter Hitch
Imagine this: You successfully climbed over a challenging pitch. While celebrating, you mistakenly dropped your rappelling gear off the cliff. What now? Well, luckily, you won’t have to stay there forever! With a munter hitch knot, you can safely descend without exposing yourself to injuries.
To tie this knot, loop your rope twice, and fold the two loops above each other. Now clip your carabiner through both loops. And that’s it! The loop will tether itself as you descend.
Final Thoughts
There you have it, everything you need to know to get starting with your own rappelling gear.
Although rappelling is a fun thing to practice, it has its fair share of dangers. To ensure top safety, you must enroll in training programs before rappelling in real life.
Also, periodically check your gear for any signs of wear and tear. If you spot any subpar tools, immediately replace them.
Have fun, and stay safe!
For more reading check out are article on the best climbing gloves for belaying and rappelling.
Editorial staff for The Wandering Climber. An expert roundup of climbing nerds from across the world!