There are many types of rock out there, with all sorts of shapes and sizes. It turns out you don’t need to rope-up to reach every summit. At least, not when you’re Alex Honnold…or while bouldering.
Whether you have no clue as to what bouldering is at all, or are looking to expand your knowledge on the subject, this is the article for you!
Hey! By the way… this page contains affiliate links. So if you make a purchase after clicking one at no cost to you we may earn a small commission. Thanks for your support!
So, Really, What is Bouldering?

Bouldering is one of the many exciting forms of rock climbing and can be done indoors and outdoors. It is a unique sport in itself (making its way into the 2021 Olympics), as well as a useful tool to improve strength and skills for better performance in other climbing styles.
Bouldering routes, called “problems”, are done without a rope and harness.
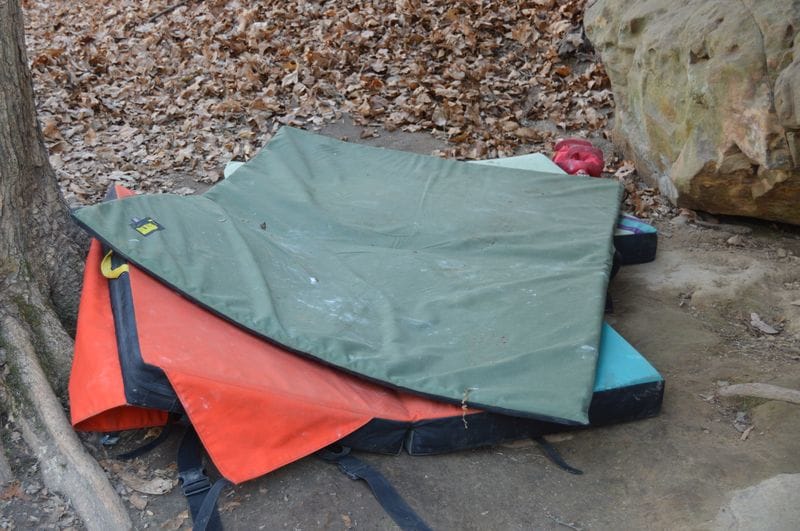
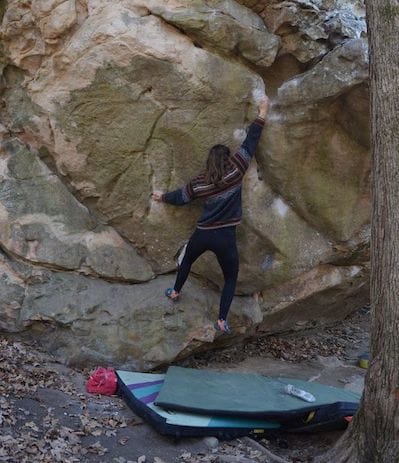
Instead, crash pads are placed underneath the climber to soften their fall. Crash pads are portable, thick rectangular mats.
In a gym setting, heavy-duty padding is permanently affixed to the ground underneath the climbs. This is so you don’t have to worry about bringing your own.
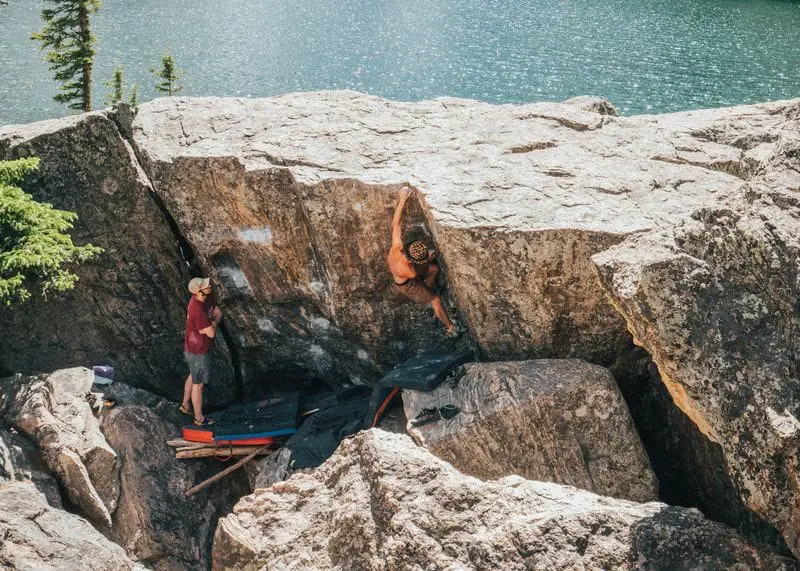
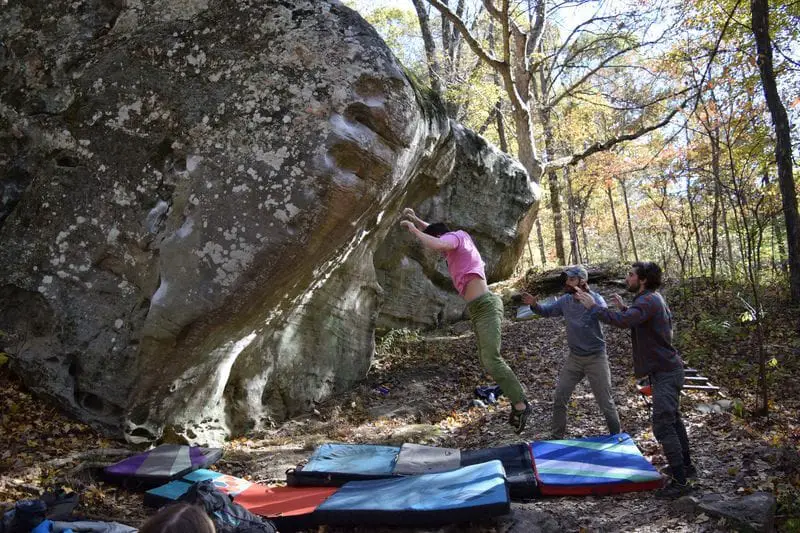
Another element of safety in bouldering are “spotters”. People stand near the climber to “spot” them from falling in a bad position.
Spotting is done more often in outdoor bouldering than indoors, as the landing area can be less than ideal outside.There are no random rocks, twigs, and trees next to routes in the gym!
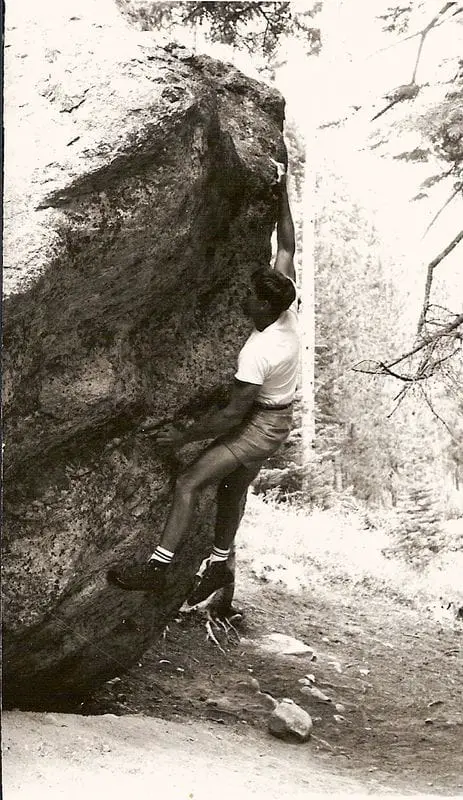
Outdoor boulder problems are usually on actual boulders: big, stand-alone chunks of rock that used to be a part of a larger formation. They can range from super short to super tall and vary in overall size.
“High balls” are super tall boulder problems that verge on being extremely dangerous. You shouldn’t worry about getting on these until you are an advanced climber, hopefully with lots of good crash pads and experienced spotters.
A reasonable height for the average boulder problem is around ten feet. The same applies in a gym setting.
However, just because a boulder problem is not that high off the ground does not mean it won’t be that difficult. It could be a long traverse, requiring a lot of endurance. Or it could be on a roof: a super overhanging rock that puts the climber in a nearly upside-down body position.
Ultimately, the goal is for the climber to complete the problem and surmount the boulder.
At the climbing gym, completing a problem involves reaching a marked “finish hold” in a controlled manner. There are usually no free-standing structures for bouldering in a gym, so you must climb down to get back to the ground.
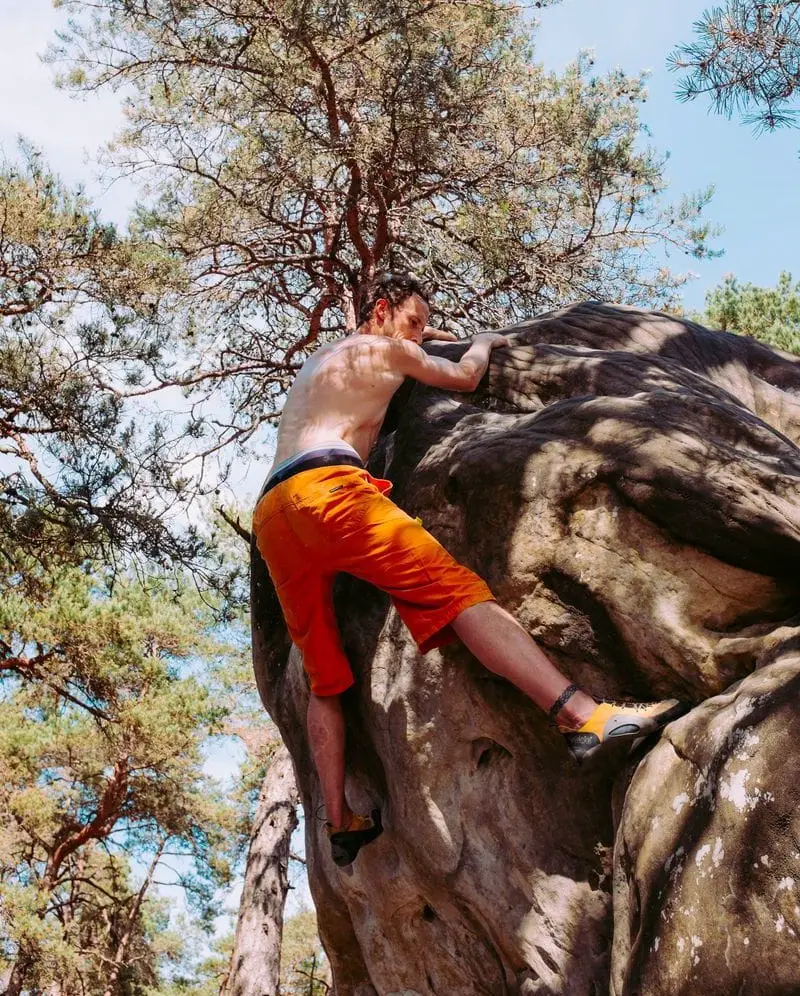
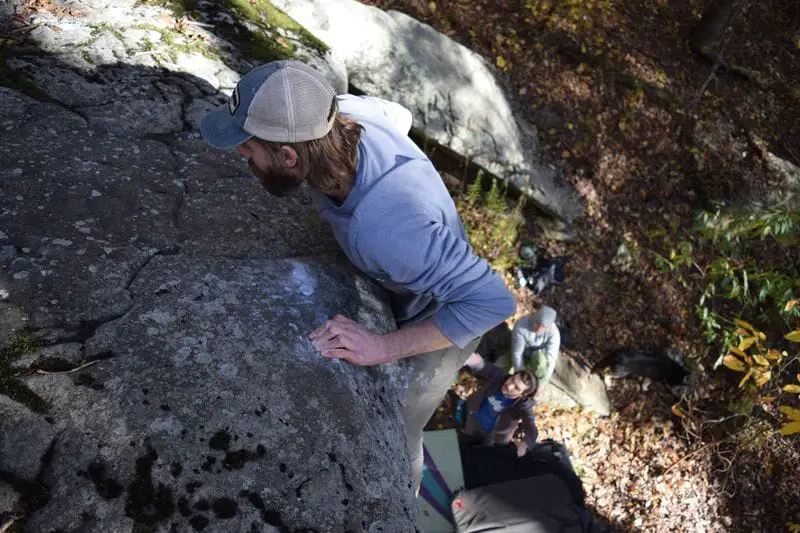
In outdoor bouldering, the climber must pull up and stand on top of the boulder above the problem to be considered as having completed it (except for the occasional arbitrarily located problem in caves and such).
To get back down to the ground, the climber can either “walk off” or down-climb on an easier section of the boulder. Many natural boulders slant towards the ground on one side, and so can literally be walked off of.
The Benefits of Bouldering
Because boulder problems are much shorter than roped climbs, they generally have a higher amount of difficult moves over a smaller span of distance.
Like the hardest sequence of moves (a.k.a. “crux”) on a rope climb, a boulder problem requires full attention and body tension from start to finish. The harder the grade, the more involved it becomes.
As a result, bouldering is a more physically powerful form of climbing, often demanding a great deal of explosive strength.
It also takes a lot of body awareness and technique. A bouldering problem is, simply stated, a puzzle unlocked with the body and the mind. The types of moves and holds you must navigate through become more complex and challenging with increased levels of difficulty.
Starting on the easier grades and working your way up allows you to develop such strength, physical awareness, and technique.
These traits are great for your overall physical health and can help improve your performance in other climbing styles (and even other sports and activities, too).
Roped sport and trad climbs often have very tough cruxes with big moves. They are like mini boulder problems spaced between stretches of more moderate climbing. Developing power and strength through bouldering will allow you to crush those moves and push into harder grades in roped climbing.
Not to mention, bouldering requires a lot less investment than all the other climbing styles. You don’t need a rope, harness, quickdraws, double rack of cams and nuts, belay device, slings, carabiners, and the extensive knowledge of how to use the stuff…I almost lost my breath typing out that list!
For bouldering, just some crash pads and maybe a spotter or a few will do. And endless stoke, of course.
Is Bouldering Dangerous?
At this point, you might be thinking, “But going up that high? With just pads?! That’s insane! I don’t even want to do it with a rope!”
Take a deep breath. You’re not crazy by being concerned about the dangers. Rock climbing can quickly become very dangerous.
However, that danger can be reduced to near non-existence by getting certified instruction, being prepared, and making the right calculations based on your skill level.
This goes for both bouldering and roped climbing.
In bouldering, the greatest risk is not falling. Falling is guaranteed – it is a part of the process of figuring out how to climb a problem successfully. This process is called “projecting”.
Rather, the greatest risk is falling incorrectly. This happens when:
- You do not know how to fall
- You do not have an adequate amount of crash pads
- Your crash pads are not placed correctly
- In instances where you need spotters, you have bad spotters
- And when, due to bad luck, you just don’t land well.
To put things in perspective: Professional boulderer Alex Puccio tore her ACL just a few feet off the mat in a climbing gym. Professional boulderer Nina Williams has sent extremely tough problems outdoors up to 50ft tall without severe injury.
Just like driving a car, you become a lot safer of a driver with more training and experience. Likewise, sometimes you get into accidents due to factors out of your control…and just plain bad luck. But you still get into a vehicle anyway!
So don’t let the risks of climbing dissuade you – but don’t feel like you have to climb a high ball to have fun and be a good boulderer.
How To Start Bouldering?
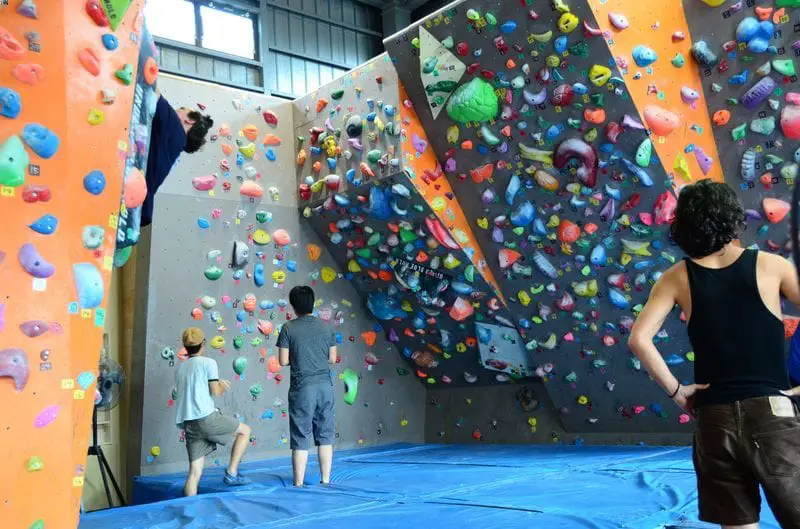
The best way to get into bouldering is to go to your nearest climbing gym.
There, you can rent the gear you need and get thorough, in-person instruction on how to boulder indoors.
Doing this is a great way to try it out in a controlled environment, with lots of padded mats to fall onto.
It’s also a good idea to go a few times and see if you actually enjoy bouldering enough to commit to before investing in expensive climbing equipment.
There are many folks of all different skill levels who go to the climbing gym. The more often you go, the more likely you are to make friends who can project routes with you and may even be interested in going on outdoor trips together.
If you become interested in bouldering outside, check if your gym or local REI provides clinics on spotting, etiquette, and general outdoor bouldering safety.
Equipment For Bouldering
Indoor Bouldering
To boulder in a gym, the only gear you need is climbing shoes, chalk, and a chalk bag or bouldering bucket.

![]()
You can usually rent these from the gym for a small fee.
Gym rentals can get the job done when you first start climbing, but become less ideal for more difficult levels of climbs.
If you intend to get more involved with the sport, consider purchasing your own. Climbing shoes are not cheap, but they do make a big difference for advancing your technical footwork.
You can also ask the staff at your gym if they host any used gear sales or visiting brand reps with special discounts.
In regards to chalk, don’t sweat it (literally).
Some climbers will argue that certain chalks are better than others. When you’re first getting started, don’t worry about it too much. As long as it serves its function – keeping the skin on your palms dry so you don’t slip off climbing holds – that’s all that matters. Frank Endo chalk is an excellent, low-cost option.

Always remember: wearing name brand climbing clothing and using pricey Friction Labs chalk won’t necessarily make you a better climber, but getting stronger will.
Be sure to get a chalk bucket so that you can keep the chalk contained, and easily coat your hands in it when needed.
Outdoor Bouldering
Once you are ready to make the transition to outdoor bouldering, you will also need to purchase crash pad(s).
A great budget option is the Metolius Session II.

![]()
For a higher performing pad, consider purchasing one from Organic.
Outdoor boulders are not like the gym. They do not already have big cushions underneath them. Rather, they have solid ground, potentially riddled with big rocks and stiff roots that won’t be pleasant to fall on even from just a couple feet up.
Start off with a pad or two, and consider investing in climbing friendships. The more people you have to go on a bouldering trip with, the better.
This is because, if everyone brings one crash pad each, you will have ample protection without denting your own wallet and will avoid struggling to the boulder field carrying four pads alone like an overburdened turtle.
The more the merrier. Also, the more spotters!
What Is Spotting?
The spotter’s job is to direct the climber to a good spot when they fall. It is not to try and catch the climber. (The job title is not “catcher” out of pure coincidence!)
A good spotter can be the difference between bad fall and a good one. They can also make for good cheerleaders! Therefore, it’s always a good idea to have at least one or two around; and to learn how to become a good one yourself, so you can watch out for your friends’ safety.
Usually, indoor bouldering has such extensive, heavy padding underneath the problems that spotting isn’t necessary.
That being said, it is a good idea to learn and practice spotting in a gym before heading to the fields outside.
From watching others, you may think spotting entails standing near the climber on-route with your arms outstretched in the air. Like you’re worshiping the boulder or something…
Let’s start by acknowledging that spotting is way more complex and critical than it seems.
There are many good spotting techniques, which vary according to different boulder problems and environments.
In general, the spotter should:
- Maintain an athletic stance, with one foot in front of the other
- Hold out their arms in a slightly-bent fashion (for maximum stability and control)
- Cup the hands, with thumbs pulled in, to prevent finger injury
- Be ready to lightly grab the climber around the waist to guide them into the safest landing position.
- Do everything possible to keep the climber falling in an upright position and protect their spine, neck, and head from impact
Another important part of spotting is adjusting the placement of the crash pads.
The boulder problem should be examined before the first attempt – particularly for crux-y spots where the climber will most likely fall. The crash pads should then be placed accordingly, without any gaps between them, and covering any rocks or roots that could twist an ankle.
The boulder problem may traverse a lot, and so pads will need to be moved as the climber goes.
If a climber falls on multiple attempts, pads might shift and cause gaps to open up between them. It’s important to re-evaluate and re-adjust the landing zone after every attempt.
Consider purchasing Organic’s Blubber pad to also help cover up gaps between multiple pads.
Always pay attention to how and where the climber falls on each attempt. This can help you refine the pad arrangement, as well as the way in which you spot them.
And the way in which you spot will rarely be the same for every boulder problem.
A high-ball boulder problem will require the spotter to take a more active role in reducing the impact of a fall. The stakes are much higher, too – so avoid spotting a high-ball problem until you have sufficient skill and experience.
When spotting a climber on a low-hanging roof, stay almost underneath them and try to grab for their armpits when they fall. This will help them land on their feet, as opposed to falling over onto their back and head.
Understanding what it feels like to fall, and how to do so properly, will also help make you a better spotter.
How To Fall Correctly While Bouldering
Most times, when you fall while bouldering, it’s not intentional. And it can be pretty tough to control how you land – especially if you’re in a weird position on the wall.
Some boulders also just have bad landing spots, with slanted ground and a bunch of big rocks that are hard to cover with crash pads.
Before getting on a problem, try to protect the landing area with crash pads as best you can. Place the pads close together so they do not have large gaps in between them.
Also, clear away any objects in the way of the landing area (i.e. chalk buckets, backpacks, headlamps, etc.). These can easily cause a sprained ankle.
Technique can also help reduce risk of injury:
- Relax and accept the fall (while softly engaging your leg muscles). You want to control your landing, but not jarr your tendons and bones.
- Be like a cat: try to land squarely on both feet, with knees slightly bent. This helps better distribute the force of the impact. Landing on the edge or heels of the feet, or even on just one foot alone, can add undue stress to your body and put you at greater risk of injury.
- Tuck your chin to prevent neck injury.
- Roll with it. Always be ready to pull off a ninja-style tuck-and-roll maneuver. This can also soften the impact on your lower body, especially for more intense falls. Become a roly-poly – curl up on your back, or onto your shoulder
- Place your arms and hands with care. You never want to land on them before your feet. Keep them close to your chest/body. In some instances, like from high falls onto the back or stomach, you may use them to brace yourself upon reaching the ground.
- Mind your position. Climbing nearly upside down, not too high off the ground? If you fall in this scenario, you’ll inevitably land on your back. Take the fall back-first – putting your arms or legs down could cause them to end up in bad positions.
As all rock climbing styles go, bouldering is never 100% safe. There is always a chance you can land wrong, no matter how skillful you are at setting up pads and falling properly.
Make sure you’re ready to accept the risk before going for the send!
Learning the Bouldering Grading Scale(s)
If you’re wanting to climb for sport, you gotta know the grades!
Bouldering actually has two types of grading scales: the V Scale and the Font Scale.
Most outdoor climbing areas and gyms in North and South America use the V scale, so don’t sweat learning the Font scale too much unless you plan on spending your climbing time in other locations.
The grade of a boulder problem is solely determined by how difficult the movement is. Other factors, like height, degree of overhang, and danger do not play into the grade.
As with roped climbing, grades are often subjective and vary among climbing destinations and gyms. So, don’t take it personally if you climb V2 in one spot and get shut down on V2 at another.
Helpful Tip: Apps like Mountain Project have helpful grade consensus features, where multiple people vote on what they think the grade is after climbing it, and the app posts that data as an average.
The V Scale
This scale was born in the famous Texas bouldering area known as Hueco Tanks.
John Sherman, aka “Vermin”, was a renowned climber in Hueco who tried to get a guidebook published for the area in the 1980s. He was forced by his publisher to define each of the boulder problems’ level of difficulty.
Prior to the book, Sherman and his friends determined their own private grading system for the boulder problems. Once the scale they came up with – the “V” scale, for Vermin – was published. it quickly spread throughout the U.S. and other areas.
The scale starts at V0, and goes up in number – V1, V2, V3, and so on – in correlation with increase in difficulty.
Again, these grades are subjective estimations. A boulder problem may be defined in a guidebook as V3, but could be “soft” or “hard” for the grade. Some places will put a “-” or “+” next to the number to denote this.
The V-scale is open-ended, meaning that higher V-ranks can be added as new progressions are made in bouldering. So far, the hardest boulder problem completed to date is (supposedly) V17.
The Font Scale
Font is short for Fountainbleu, the bouldering area in France where the Font-Scale originated. It is predominantly used in Europe and Asia, and can be helpful to learn for travel to these areas and for understanding climbing news regarding notable first ascents.
The Font Scale starts at “1” and increases in number with difficulty, like the V Scale.
However, once the scale reaches “6”, it gets a lot more complicated. An “A”, “B”, or “C” can be added at this point to more specifically denote the level of difficulty.
So, a problem can be a 6A, 6B, 6C, or 7A, 7B, or 7C, and so on.
A “+” sign can also be added after the letter to indicate greater difficulty, but not to such an extent as to warrant an entire letter grade increase. For example, an 8B+ is harder than an 8B, but not as hard as an 8C.
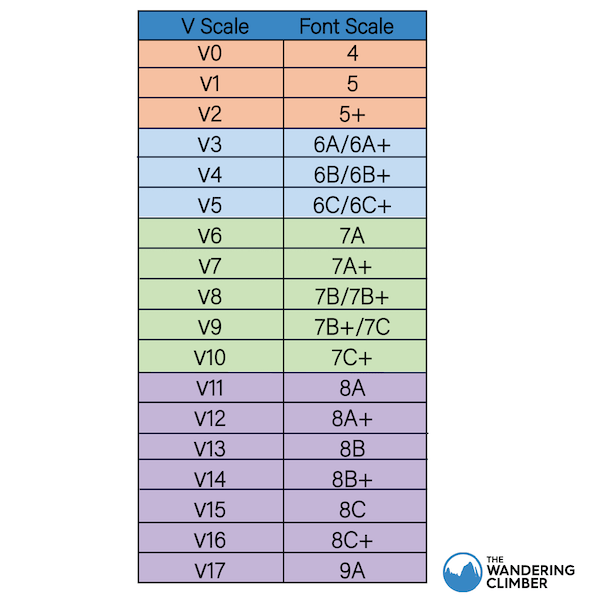
If you’re wondering what a Font Scale grade is on the V Scale, check out this conversion chart:
Bouldering Terminology
Going to the climbing gym/area for your first time is always an intimidating, awkward process. We’ve all been there…showing up, and not have any idea what you’re doing but trying to play it cool.
It certainly doesn’t help when the people who try to give you advice seem to be using a totally different language.
Rock climbing has a special jargon, no doubt. Although there’s a lot of crossover between the styles, there are some words unique to each.
For the most part, the lingo arises naturally – or, rather, sounds fitting for what it represents. You’ll pick it up faster than you think!
Here’s a list of some of the most popular words used in bouldering:
Beta – The particular movements and holds used to climb a problem. Can vary among climbers. Can also be given from one climber to another, upon request or undesirably (EX: “What’s the beta on the purple V1?”)
Crux – The most challenging part or sequence of movement on a climb.
Handhold/Foothold – These are the indentations and features on a wall where you can grab onto and/or place your feet.
Slab – A type of climb with tiny and minimal holds. Usually requires a lot of technique and balance.
Crimp – A tiny hold, grippable only by one’s finger tips. Also used as a verb, ex. “I crimped my way through the crux”, and an adjective: “that problem is super crimpy!”
Jug – A big hold, almost like a handlebar, which you can grip your entire hand around and behind. Jugs are your best friend in climbing.
Sloper – A prominently rounded surface used as a hold. Can be big or small. To use a sloper, one must curl their palm around it and engage the wrist. Problems with slopers are better done in colder weather for the utmost friction, so as to reduce the chance of slipping off of them.
Sidepull – An angled hold that can only be grabbed sideways (from left to right or from right to left).
Undercling – An angled hold that can only be grabbed from under and pulled upward on. Can be tricky to find on outdoor climbs.
Pocket – A small hole that can be used with less than five fingers. A two-finger pocket can only be grabbed with two fingers, and a mono with only one.
Dyno – A type of climbing move, where you dynamically launch and throw for the next hold using one or both hands.
Heel Hook – A technical climbing move where the heel is placed on a hold to help with stability.
Toe Hook – A technical climbing move where the toe is hooked onto a feature to help with stability.
Send – To complete a boulder problem without falling.
Flash – To send a boulder problem on the first try.
Onsight – To send a boulder problem on the first try without examining the climb, being told the beta, or watching someone else do it.
Project – A problem you are working on and have not yet sent. To “project” a problem is to work out the moves until you can send it.
Top Out – To send a boulder problem and successfully achieve a standing position on top of the boulder itself. Not all boulder problems can be topped out.
Mantle – A method for getting up onto the top of a boulder (i.e. “topping out” a problem) by pulling one’s weight up, then pushing down onto the surface to bring the body up and over.
Sit-Start – A way of starting a boulder problem with one’s bottom on the ground. Sit-starting tends to make the problem more difficult, as it requires more core strength to pull up onto the climb.
Tips for Beginner Boulderers
Getting comfortable at the gym and improving your performance takes a lot more than just lingo.
Bouldering is one of those sports that you must invest consistent time and energy in to see results.
The best way to start is by climbing as much as you can. Send a ton of V0s and V1s.
Get a bunch of the easier climbs under your belt so you can familiarize your body and mind with the vertical world and develop a solid foundation of technique.
Then, go after progression like a pyramid. Once you break into a higher grade, try to send as many more of that grade as you can before dedicating too much time on the next- higher grade.
Get on various styles of problems, from vertical to overhanging. Watch videos on technique, and work problems with other climbers at the gym or boulder field.
A Brief History of Bouldering
Scrambling around on boulders, in some form or another, has likely existed for centuries.
Some of the first documented “boulderers” dated back to the late 1800’s. In France’s famous Fountainbleu, mountain-climbers would use the boulders for training and exercise before chasing after high peaks.
Pioneers of what we formally consider as bouldering today are still debated, but most fingers point to John Gill.
In the 1950’s, John Gill incorporated his zeal for gymnastics into a significantly more challenging, modern style of climbing on boulders. By 1959, he had put up a V8 and V9 in the Tetons of Wyoming. By 1969, he had successfully published an article in the American Alpine Club Journal titled “The Art of Bouldering”.
It is no wonder that, being a gymnast, Gill carried his chalk out with him to the rocks and thus started the (very useful) tradition of using chalk while climbing.
Gill’s goal was to establish bouldering as a sport in and of itself. Throughout the years since he began this journey, bouldering gained popularity exponentially.
In the 1970’s, climbers in Hueco, Texas were putting up iconic and challenging problems. Hueco is considered to be the true birthplace of modern bouldering in the U.S.
After the first guidebook for bouldering in Hueco was published in the early 1990’s, along with the advent of crash pads, bouldering really took off.
As of today, boulders have sent problems as difficult as V17, and there are more strong climbers dedicated to bouldering than ever before. Sponsored athletes and regular folks alike travel all over the world to experience the wonder of bouldering in different areas. Not to mention,
Bouldering is now in the Olympics!
Where Can I Go Bouldering? ~ Awesome Places to Boulder in the U.S.
EASTERN AREAS
Holy Boulders, IL
Horseshoe Canyon Ranch, AR
Stone Fort, TN
Horse Pens, AL
Rock Town, TN
Rumbling Bald, NC
New River Gorge, WV
The Gunks, NY
WESTERN AREAS
Yosemite, CA
Joshua Tree, CA
Bishop, CA
Red Rock, NV
Joe’s Valley, UT
St.George, UT
Moab, UT
Flagstaff, AZ
City of Rocks, ID
Leavenworth, WA
Good Boulders to Watch for Inspiration
There’s nothing like a good climbing video to get your palms sweating and your excitement high to pull on some rock! They can also be useful tools to gain insight into technique.
When looking for videos, try searching particular professional climbers that you enjoy watching.
Here are a few good ones to start with:
Ashima Shiriashi was sending V10 by the time she was 8 years old. She is no doubt on the frontline of rock climbers setting new standards and achieving the impossible.
If you’re interested in learning about the world’s most difficult boulder problem established to date, check out Nalle Hukkataival on the Lappnor Project.
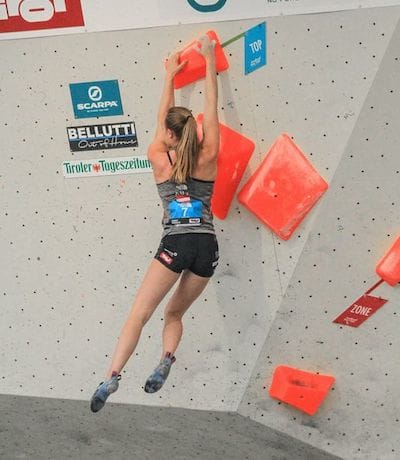
Psyched on the awe-inspiring gymnastic style of indoor bouldering? There’s a plethora of Indoor Bouldering Competition videos on YouTube. Here’s a good one to start with.
These are just a few samples of the climbing videos out there. If you find yourself wanting more, don’t worry – there’s a very deep rabbit hole of climbing material on the internet today between YouTube, Vimeo, and other video archives.
Conclusion
Bouldering is a blast. You can do it alone, or with a large group of friends; in the gym, or an endless variety of places outdoors. It gets you fit and strong, and has clear benefits for roped climbing performance.
Bouldering has very low barriers for entry (especially compared to roped climbing), and can provide high returns. As with other forms of climbing, bouldering has a growing community of passionate individuals who love getting out and enjoying the sport together.
Your experience bouldering can thus become many things – a way of developing close friendships, of achieving new levels of personal athleticism, of traveling to beautiful places around the world…or even all three!
Starting a new hobby is always a little intimidating. But this one will be worth it – I promise.
So get out there and get after it!

Melissa is a full time van-living outdoor enthusiast hailed from Florida. After deciding to spend her freshman summer of college living out of a tent to work and climb in the Red River Gorge, Kentucky, her life changed forever. She found her way to El Potrero Chico, Mexico in the winters, where she fell in love with travel and community. Post-graduation, she drove from Florida to Alaska to experience its world-class backpacking, then worked her way back south to explore climbing spots throughout the western U.S.
Meeting countless amazing people, hearing their stories, and learning the histories and struggles of local areas through minimalist travel, climbing, and hiking has inspired her to share these experiences with others. Her passions include improving intersectional access to the outdoors and responsible environmental stewardship.