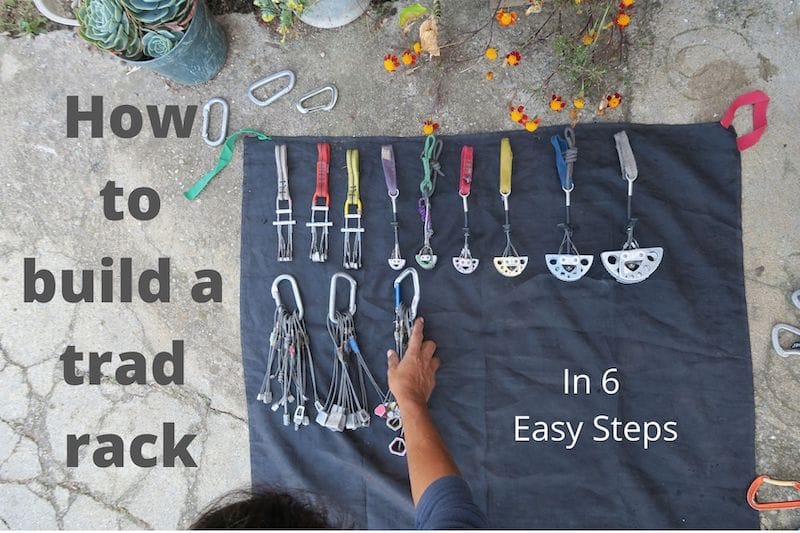
It can seem overwhelming at first, but it is really not that complicated to build your first trad rack! With just a little preparation before you buy you can make sure to get exactly what you need.
We have written up a comprehensive step-by-step guide on how to build your very first rack for trad climbing, what you should consider and how much all this might cost you.
Hey! By the way… this page contains affiliate links. So if you make a purchase after clicking one at no cost to you we may earn a small commission. Thanks for your support!
What is in a standard trad rack?
This can be a tricky question, because it really depends on where and what style of traditional climbing you’ll be doing.
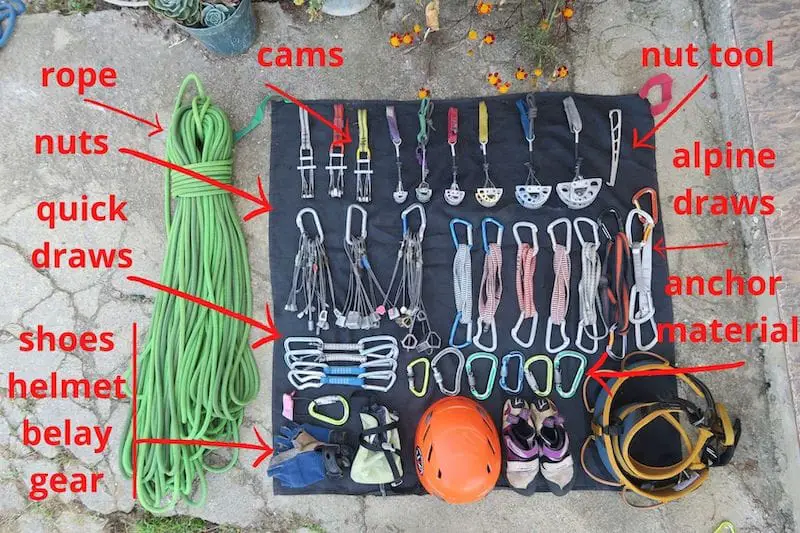
Next to the usual helmet, harness, rope, shoes and chalk, you will need some extra gear to place as protection while you climb.
We will roughly divide the components of a standard rack into two categories: The protective gear on the one hand, and the personal safety equipment and anchor material on the other.
Passive and active protection
These are the metal bits you place in the natural cracks of the rock to catch your fall. We differentiate between passive and active protection, depending on if the equipment has moving features or not.
Passive protection are fixed wedges of metal, protecting mostly against downward forces and used in cracks that are not perfectly parallel. The most commonly used ones are called nuts and hexes.
Tricams also fall in this category, although they can be moved to a certain extent.
Active protection on the other hand, includes all types of gear that have moveable features, like the lobes on a camming device. These are good for parallel cracks and can be placed fast while climbing. They are probably the most expensive type of equipment you will buy, but they are worth it!
Slings, carabiners and anchor material
Like in sport climbing, you’ll need carabiners and slings to clip your rope onto the protection. But trad routes tend to wander more because you aren’t following a line of bolts.
This is why you should not use normal quick draws on trad routes, but, instead, alpine draws, which are extendable. They reduce rope drag and, therefore, reduce your gear from “walking” in the crack while you climb.
You’ll need to get either “ready-made” draws or you can buy slings of 24’’ or 48’’ and carabiners, and assemble them yourself. You will also need additional slings and cordelettes for building anchors and rappelling.
A few extra safety carabiners for your anchor are useful as well. Some prefer to use half ropes when trad climbing because of the drag, but that’s also personal preference.
Belay and personal safety gear
If you’re going to be climbing trad, you might soon start to look at some easy multi pitches to tackle. So if you get a belay device, a model like the ATC Guide is a good option because it will allow you to belay your partner from the top while he or she is ascending.
The overview
So, now that we know the different components of the rack, here is how many of each item you should get for your first, basic rack:
- Cams that are finger- to hand-sized, get 6 to 8 in the most standard sizes from 0.5’’ to 3’’
- A set of nuts, usually 10 to 12, that you can buy in sets
- 8-12 alpine draws
- A nut tool
- A couple of 48’’ and 96’’ slings to build anchors
- Non-locking carabiners to rack all the gear you have, the number the depends on how much gear you have and how you decide to organize
- Personal belay device with guide function and cordelette for a safe rappel
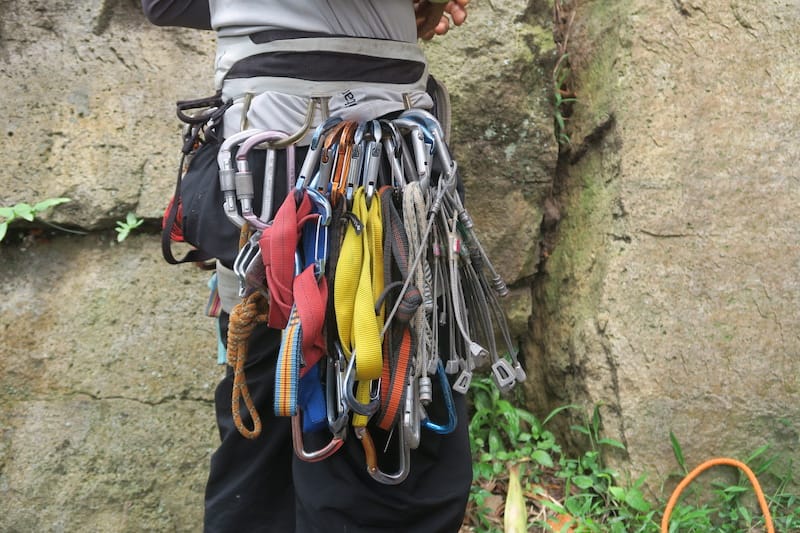
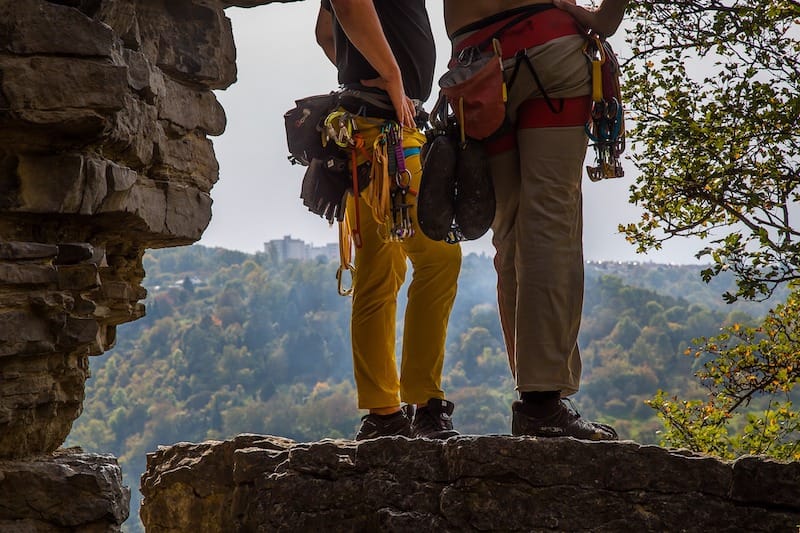
This may sound like a lot, but you will probably use most of your gear while climbing! To make sure you know where everything is, you need to work out your own system of how to rack your gear.
There are different options, from using the gear loops on your harness to a sling across your chest or even specialized trad chest harnesses to organize all your things.
How to start building a trad rack
Now let’s move on to the practical part! Before you go out and start buying stuff, it is important to do some homework and think about what type of trad climbing you will be doing and what gear you might need more of.
Step 1 ~ Questions To Ask Yourself
Where do you climb?
Look at where you will be most likely to climb your first trad routes and check the guidebooks of the area, to see if they list any specifics about the necessary gear. Guide books often list the type and size of gear you need for a specific route so have a look around the most probable routes you’ll be tackling first.
Unfortunately, the sizing of camming devices varies across different brands, so sometimes instructions in a guide book might not match the sizes of your gear. You’ll have to look up the “conversion” so to speak.
Step 2 ~ Carabiners and slings
Alpine draws
Like we mentioned above, for trad climbing you will need long draws that you can extend if needed. This helps to reduce rope drag and keeps your protective gear in place.
An alpine draw is essentially two non-locking carabiners with a 24’’ or 48’’ sling in between. It can be looped up in a certain way that you can easily extend it if needed. You can either buy those pre-assembled or you can just buy the necessary pieces and make them yourself.
Pre-assembled ones cost about $20 a piece, here are some options by Trango and Black Diamond

![]()
Non-locking carabiners
Depending on how you choose to rack up your gear, you will need quite a lot of non-locking carabiners to hold all your nuts, cams and hexes. If you choose to add a single carabiner to each cam, for example, color coding the carabiners with the cams will make your rack much easier to keep tidy and organized.
Step 3 ~ Nuts and nut tool
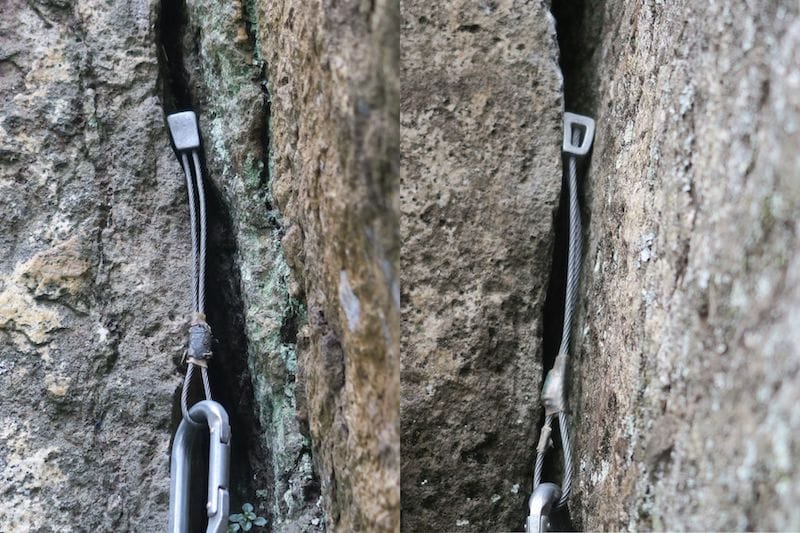
These are passive protection we have mentioned above. Nuts are simple, light and cheap in comparison to cams and work well in almost all settings except parallel-sided cracks. Nuts were the original piece of protective gear, so they should not be missing from anyone’s rack.
Nuts
These little helpers are essentially bits of metal on a wire. Sounds simple, but they are efficient. They come in a variety of sizes from matchstick-head to fist-sized and are a very versatile piece of gear.
Even though they don’t move, you can place each of these pieces in four different ways due to their asymmetrical shape. What is essential when placing them is that they have the maximum possible surface contact, as they rely on friction to stop your fall, unlike cams, which can expand on impact.
They are also called stoppers or wires and chocks and, for a beginner’s rack, you should get a set of about 10 to 12 nuts. Most people rack similar sizes together on one carabiner, dividing all the nuts across two to three carabiners.
Nut tool
A nut tool is essentially a piece of metal to get other pieces of metal out of the rock.
Many times it is essentially impossible to remove a well places nut. A nut tool helps you wriggle out nuts (and cams) which are far back in the crack or other wise unreachable.
Hexes
Hexes are another form of passive protection, but bigger than nuts and hollow. They resemble an asymmetrical six-sided piece of tube that hang on a wire and are placed into cracks similar to nuts. Also called “hexentricts” and a beginner would be advised to include one to two mid-sized hexes into their rack.
Step 4 ~ Cams/Friends
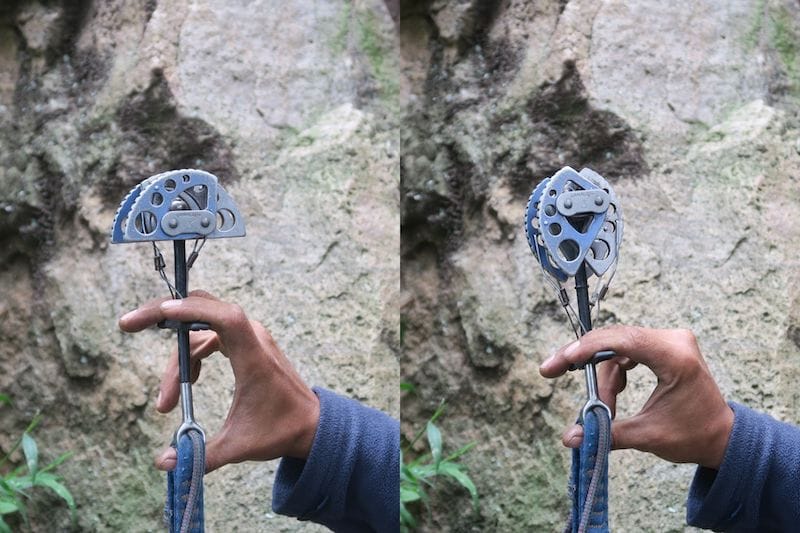
Spring-loaded camming devices, or cams, are a form of active protection. First invented by the brand Wild Country, their brand of cams is called “Friends” and have inspired many other similar types of cams by other big outdoor brands.
Cams will be the most expensive part of your rack, but they are worth their weight in gold. They are easy and quick to place, fit into parallel cracks where nuts and hexes are more likely to move and are generally considered a “bomber”, when placed correctly.
They are called active protection because the 3 or 4 lobes can be pulled down to reduce them to a smaller size. When placed in a crack, make sure they don’t open up too far and the crack doesn’t flare out above or below them.
When you fall, the force of your weight will cause them to open up more, creating forces towards the two sides of the rock, holding the cam in place.
They come in a lot of different sizes but as a beginner, you should focus on sizes 0.5’’ to 3’’ and get about 6 to 8 cams to start out with. Most people won’t buy a set, just pick up the specific sizes they need. It can be hard to know which sizes you’ll be using most often when you just start out, so a set in the most standard sizes might still be a good idea if you have the budget.
Step 5 ~ Anchor Material
Building anchors really requires a whole separate article (or book) and there are a lot of different opinions out there. But some material that you should always carry with you are three to four locking carabiners and a couple of longer, 48’’ or 96’’ slings. These are the most basic materials to build a safe 3-point-trad-anchor while out and about.
Another important piece of safety equipment is a belay device, ideally with a guide function, for easy belaying from the top on multi-pitches. This gear is quite basic and doesn’t cost a lot, so make sure not to be stingy in the wrong place.
Step 6 ~ Use and refine
Now that you’ve bought all your gear, it’s time to hit the rocks! While you climb and use your gear, you will quickly notice if there is something missing or if you will need doubles of some of your equipment.
Depending on where, when and how often you climb, you will notice your preferences and what gear you could use more of, so you can add to your rack as time goes by. Since the gear is not especially cheap, most people buy their first trad rack bit by bit over time, not all in one big shopping spree.
Speaking of a shopping spree, how much will it cost you to get your rack together?
Note on Uncommon pieces
Of course there is a lot of other gear out there that you can use on a trad route. But things like tri cams, big bros or ball nuts won’t be necessary for a beginner, as they are more specialized equipment.
Tricams are similar to nuts but need a constriction to work efficiently. They have an active and a passive mode, depending on how you place them. They work well for protection in horizontal cracks, and can be placed in parallel cracks when in active mode, because the downward pull opens them up.
Big bros or tube chocks are expandable tubes that are used in wide cracks. Imagine a kind of very stable shower curtain that you wedge into a chimney, for example. They are lighter and more compact than large cams, but harder to place and can’t be shuffled up a crack.
Ball nuts are spring-loaded protective gear that can be used for cracks smaller than one inch and can be used where not even the smallest cam will fit. For beginners, they are not really necessary, but are something you can look at once you get more into trad climbing.
How much is a trad rack?
It is possible to buy used gear online or in some stores, but the opinions on whether that is safe, vary. If you are very new to climbing, buy used gear with caution since you may not have the expertise to determine just how “used” the gear really is.
Now, let’s assume that you already have the basic climbing equipment like a harness, helmet, rope, shoes and a belay device and all you are missing are the protective gear, nut tool, extra carabiners and alpine draws.
Here’s the rundown…
Nuts
Some of the most popular nut sets out there are by Black Diamond, Metolius and Wild Country where each piece comes in at about $15 to $20 each.

![]()
Czech brand Kouba is a bit of a secret tip and not available on Amazon, but might be a cheaper option for European based climbers with a set of nine Alu nuts for just 50 Euros.
Let’s average that and say, a set of nuts will cost you $100.
Cams

A set of cams from 0.5’’ to 3 ‘’ can cost about $400.
If you buy them individually, they will rack up about $60 a piece when we look at some of the most common brands like Black Diamond, DMM or Wild Country. Kouba, our Czech wizards, offer a set of 8 cams from 0.25 to 6 for 300 to 350 Euros and sell individuals from 30 Euros.
So if you are looking to get about 6 to 8 cams, let’s estimate $450.
Nut tool
Small but efficient. Doesn’t break the bank and there are loads of different options out there.
Estimated spending $15.
Alpine draws
Pre-assembled ones cost about $20 a piece and here are some options by Trango and Black Diamond. You can also buy the biners and slings separately and assemble them yourself, so you might not even need that much new gear.
Estimated price for 8 draws, $160.
Anchor material
Slings, locking biners and cordelettes together won’t cost you much more than $20 to $25, depending on what you already own and can use.
Estimate, $20.
The Summary
So, looking at these estimates above, we are looking at $745 for a basic trad climbing rack with a set of nuts, a handful of the most used cams, a safe number of alpine draws and some equipment to build anchors and a nut tool.
Further along you might want to look into buying another harness that is a bit comfier and have more gear loops to accommodate all your newly acquired babies.Other optional gear you could get are a climbing pack, crack climbing gloves for crack climbing or some more comfy shoes for trad climbing.
How much does a trad rack weigh?
How long is a piece of string?
This is a difficult question to answer because it greatly depends on the route you are climbing, how new/old/ultralight your gear is and how experienced you are.
A standard rack with two sets of nuts, 15 quick draws and 8 cams quickly sums up to about 3.5 kg. However, the more experience you get, the less gear you will bring because you will know exactly what you need.
Beginners tend to carry a bigger rack because they bring everything along with them on the route. But remember, you don’t have to schlep your whole rack up the crack if you can tell from down below that you won’t be using any placement bigger than a hand jam.
What is a Double Rack?
A double rack or doubles means that you have some of your gear twice on your rack. With time, you will notice what gear you use most and what is worth doubling up on. This will most likely be some cams in the most standard sizes, which can come in very handy on a longer climb.
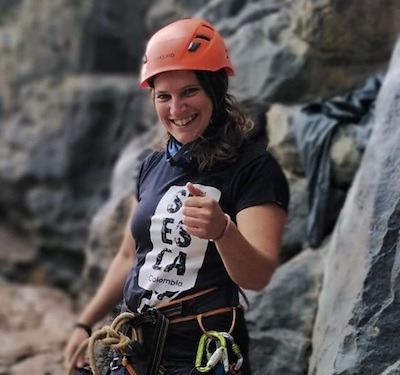
Hi there, I am Mirjam and have recently discovered rock climbing for me while backpacking in Colombia. Originally from Switzerland I currently live in Venezuela and work as a freelance writer and translator. I have always loved being in nature and the mountains and am stoked to explore more of the world’s best climbing in the years to come!
You can find me at @mirigoesround or www.bosstranslations.com